In this tutorial we will show you how to add multiple places to your app, in a map or a list view.
A common use of this feature is when you want to add contacts and directions for all your organization’s offices or making an itinerary of the local points of interest.
Feature Places
To add places and display them in a map view, press the “New Feature” button, select the “All” tab and choose the “Places” feature.
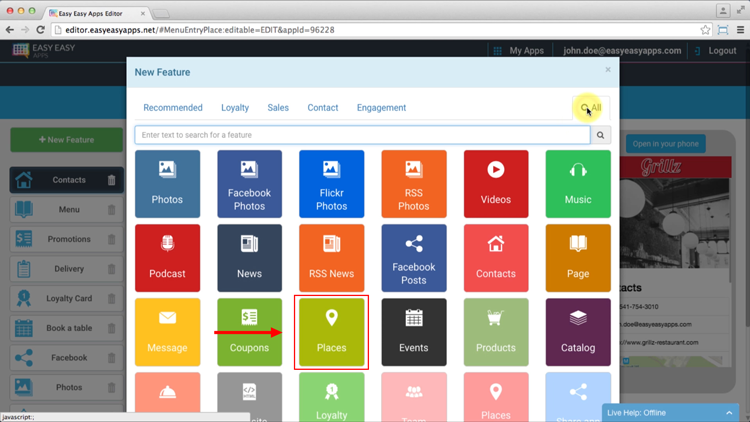
Start by configuring the feature, entering a name and choosing the icon you prefer.
Adding content
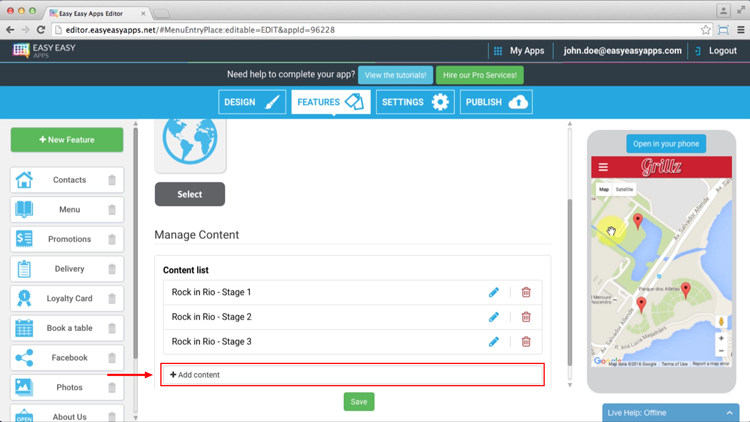
The content area allows you to add all the information for each point that will be visible in the map and details screen.
To add a new place press the “Add Content” button.
In the title field enter the name of the place to promote.
To upload a photo that will show in the detail screen of the place, press the photo upload button and choose the file from your computer. Don’t worry about the image dimensions, it will be adjusted to the smartphone screen without distortion.
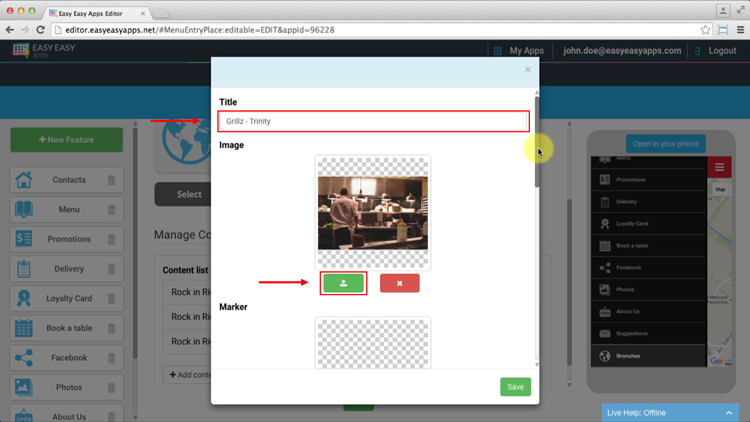
You may upload an icon that will show in the map, representing the place’s geolocation. If you don’t upload any file for the map icon, the app Maker will use the Google Maps’ icon by default.
In the content field you should enter the text that will describe that place. You may include titles, create lists and style the text in different ways.
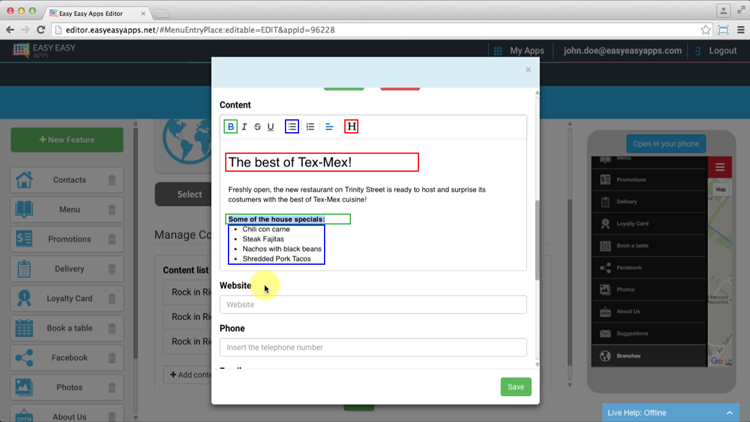
Subtitle
List
Bold
The “Website” field allows you to add a link to your site. When an app user presses the link in the smartphone, the browser is going to open your website.
The “Phone” field will work with Click to Call. Meaning that the user just need to press the phone number and the smartphone will automatically call to the configured number.
Enabling the click to call in your mobile app is very important. In a recent Google study, it was found that 70% of the mobile searchers use the click to call to contact businesses.
In order for the click to call to work properly in your app, you should include the country code. If the app user has an international number, that way, he or she will be able to call you directly.
By entering your phone number, you can use spaces and dashes to display the number in a friendlier way.
To test the click to call feature, open the app in your smartphone by pressing the “Open in your phone” button and follow the instructions.
In your smartphone, navigate to the Contacts feature and press the phone number that you see in the screen. It should have opened a window to make a phone call to that number.
The “Email” field allows the app user to send you a message in a single step. For that to happen, you should setup the email field with the address you want to receive your app users’ messages.
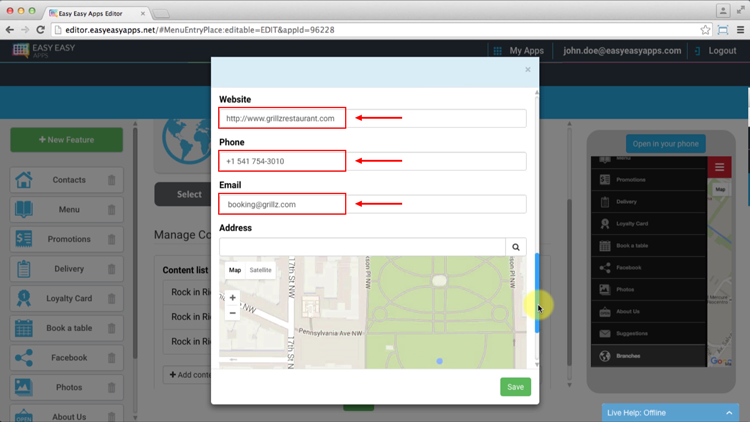
The "Address" field will save the place’s geolocation. This information allows the app users to see each place in the exact map point along with its full address.
This feature also offers the users a quick and easy way to get directions to the Place’s location in a single step.
When a user presses the map image or the place’s address, he will have the possibility to go directly to the map app that is installed in his device.
This way the user can get directions to that place based on their positioning.
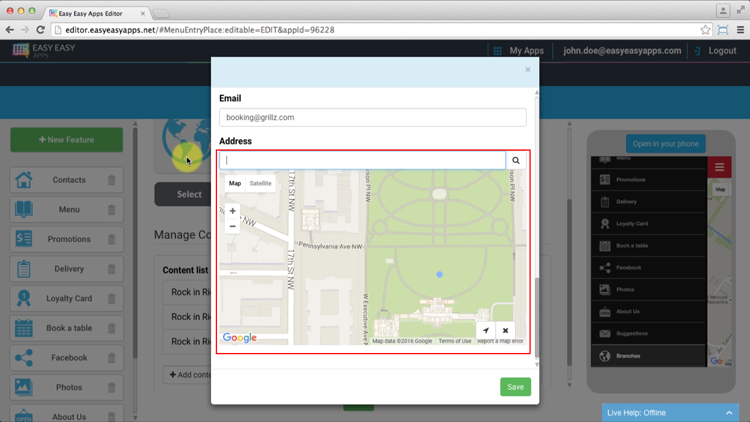
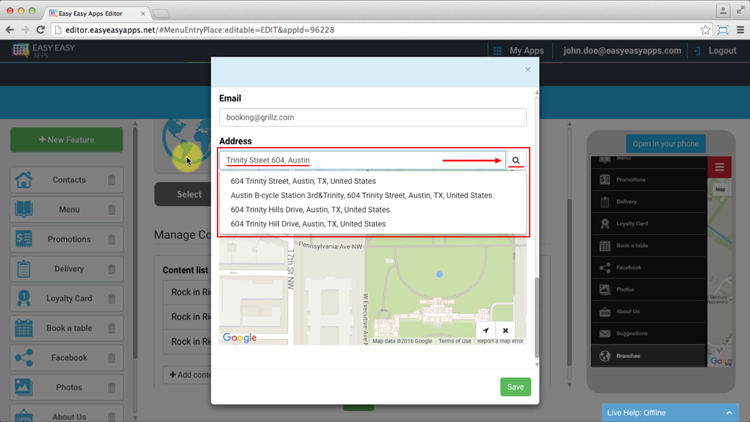
To configure the address, you can enter the full address in the designated field as if you were entering it in Google Maps.
Automatically, the app maker will try to complete your address giving you the best suggestions based on google maps information.
After you enter your complete address, press the “enter” key or on the magnifying glass icon. The calculation of your position on the map is done automatically depending on the address you entered.
You can also drag the map and put the pin in the right location.
When you do that, an update symbol will appear in the address field.
When you press the update symbol in the address field, the app maker will automatically calculate the address of the location where the pin is.
If you don’t want to show the map and the address in the App, press the X button and all the data will be deleted.
Viewing content
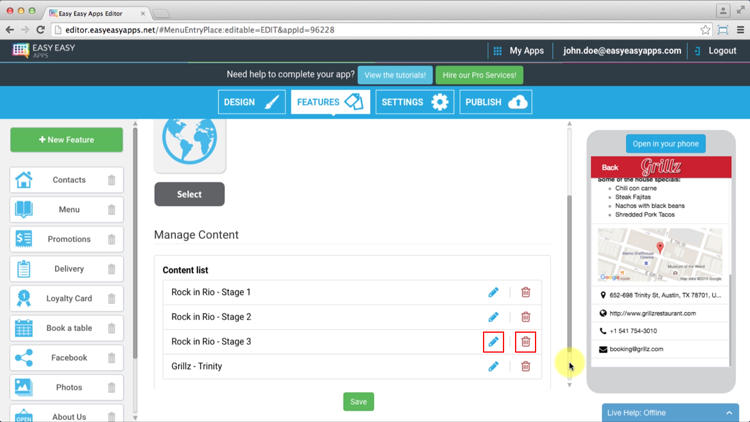
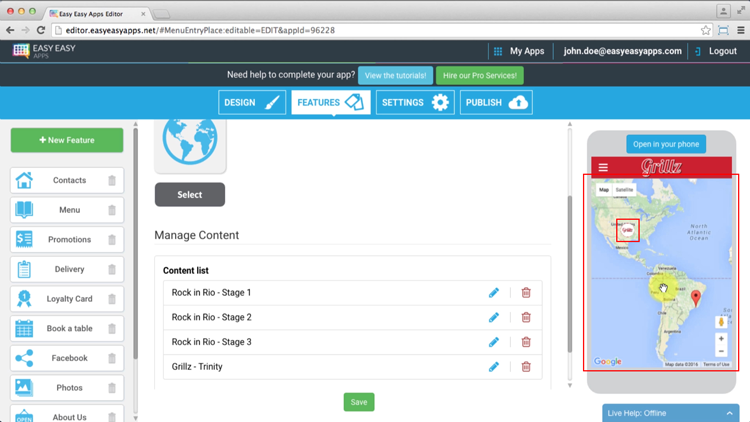
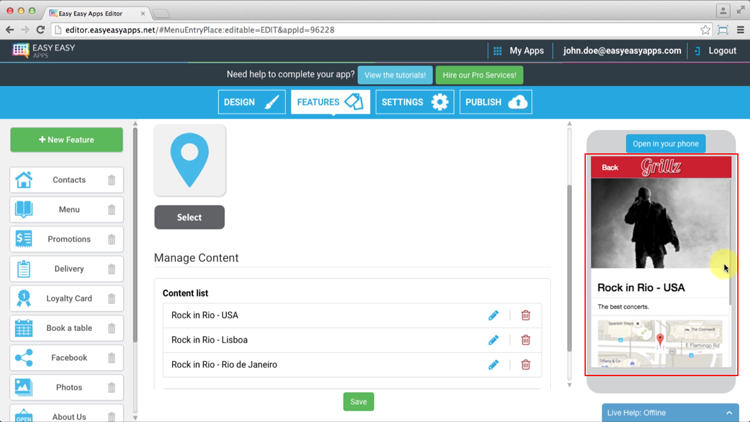
As you can see, the content is immediately available in the Live Previewer.
The map icon is only visible in the map screen, however the title is also visible in the details screen of the Place.
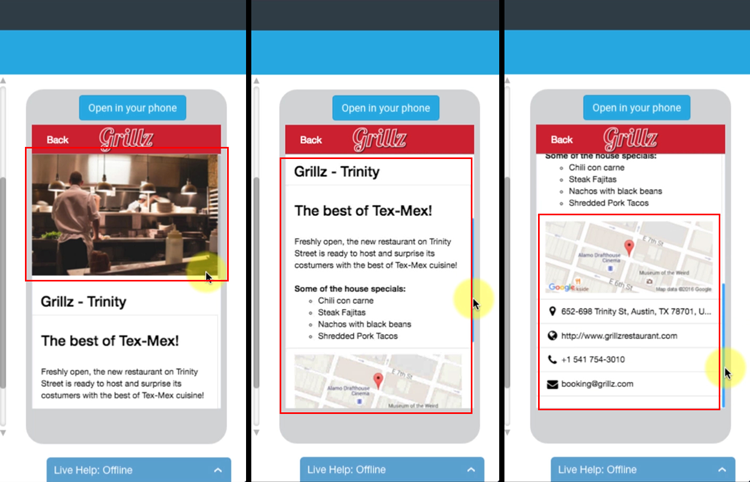
The image is only visible in the detail screen of the Place along with the information entered in the “Content”, “Phone”, “Email”, “Website” and “Address” fields.
Edit and remove content
To edit the contents of a place, press the “Pencil” icon, update the fields that you want to change and press “Save”. You can always see the changes in the Live Previewer.
If you need to remove a Place, just press the trash icon and after confirming your action, the Place content won’t be available in the Live Previewer and in the Content list anymore.

Places List feature
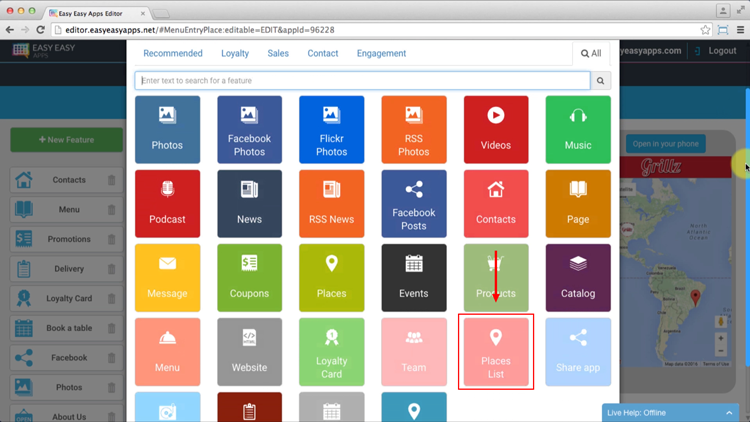
Easy Easy Apps allows you to display your Places in a List mode. For that, press the “New Feature” button, select the “All” tab and choose the “Places List” feature.
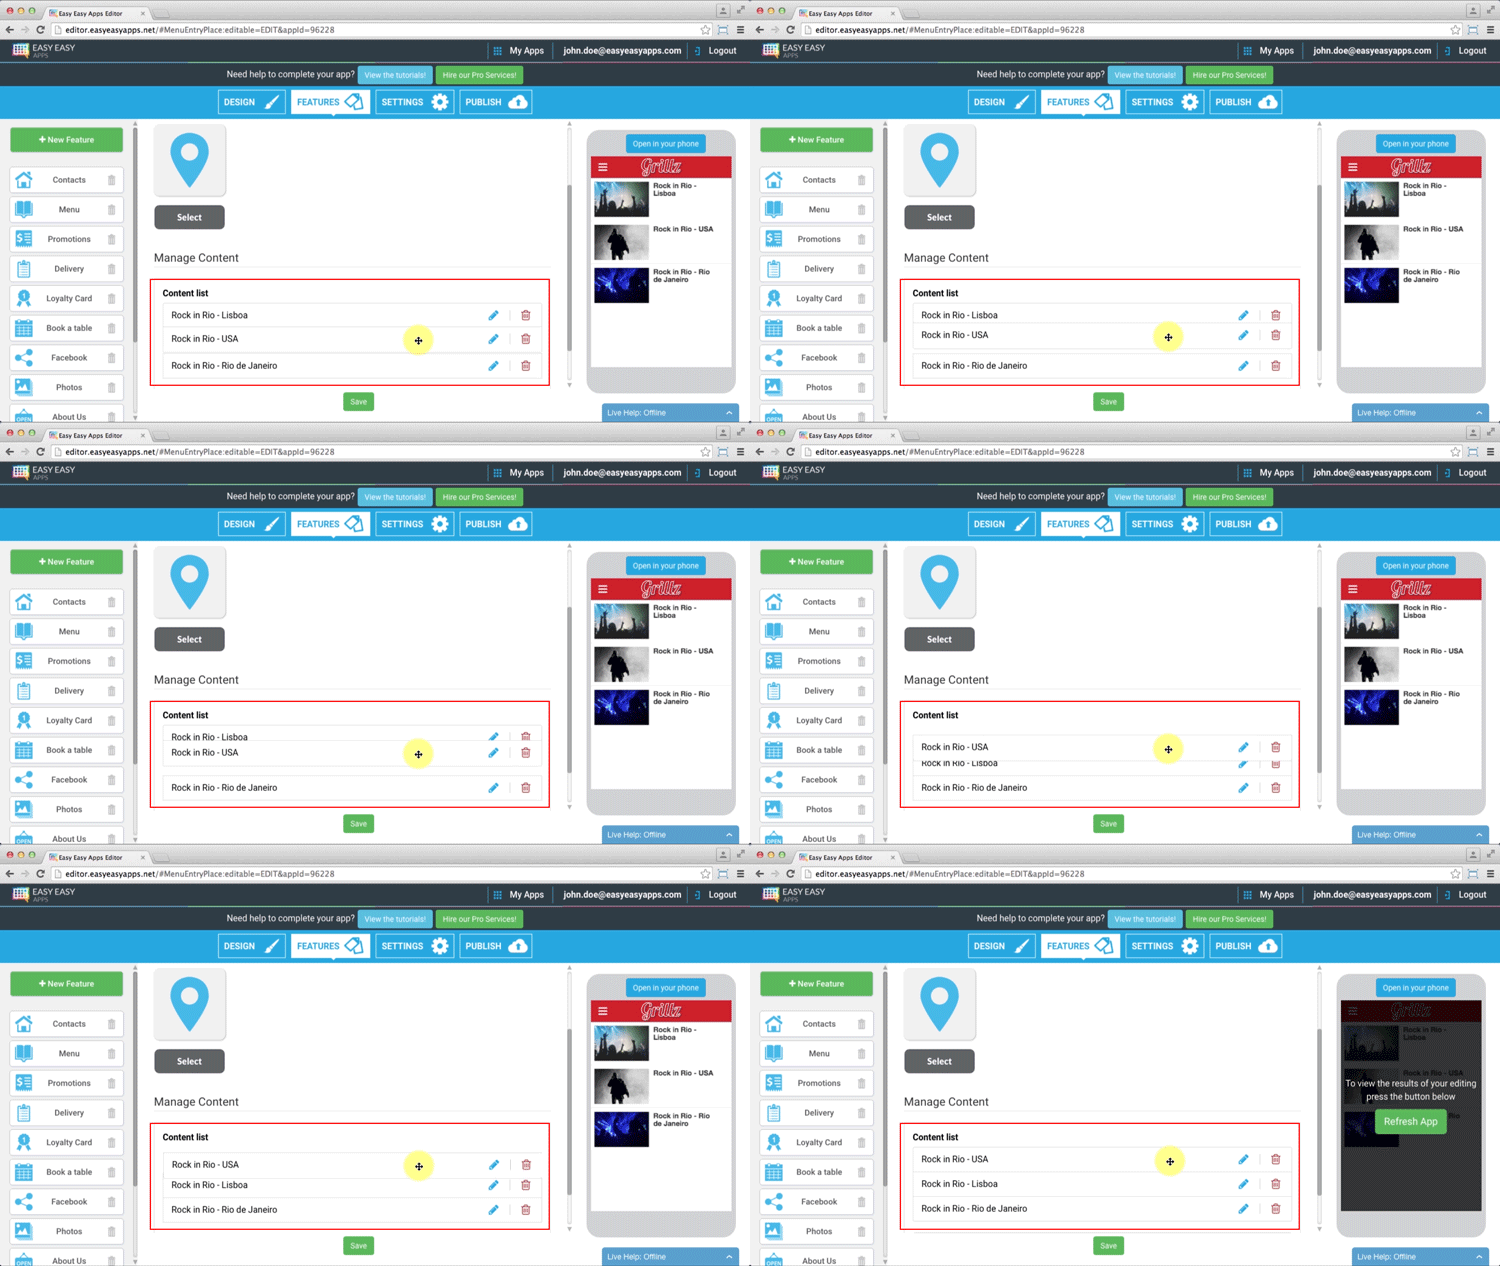
The “Places List” feature allows you to change the places list order, by dragging one place and dropping it in the new position.
This way you may show the app users your Places list in the order that you prefer.
By pressing a Place entry from the list, the app users can see the details screen with all the Place information and get directions to its location.
Thank you for watching this tutorial, leave your comments and we will contact you.
Don’t forget to share!