Sign Up for Easy Easy Apps
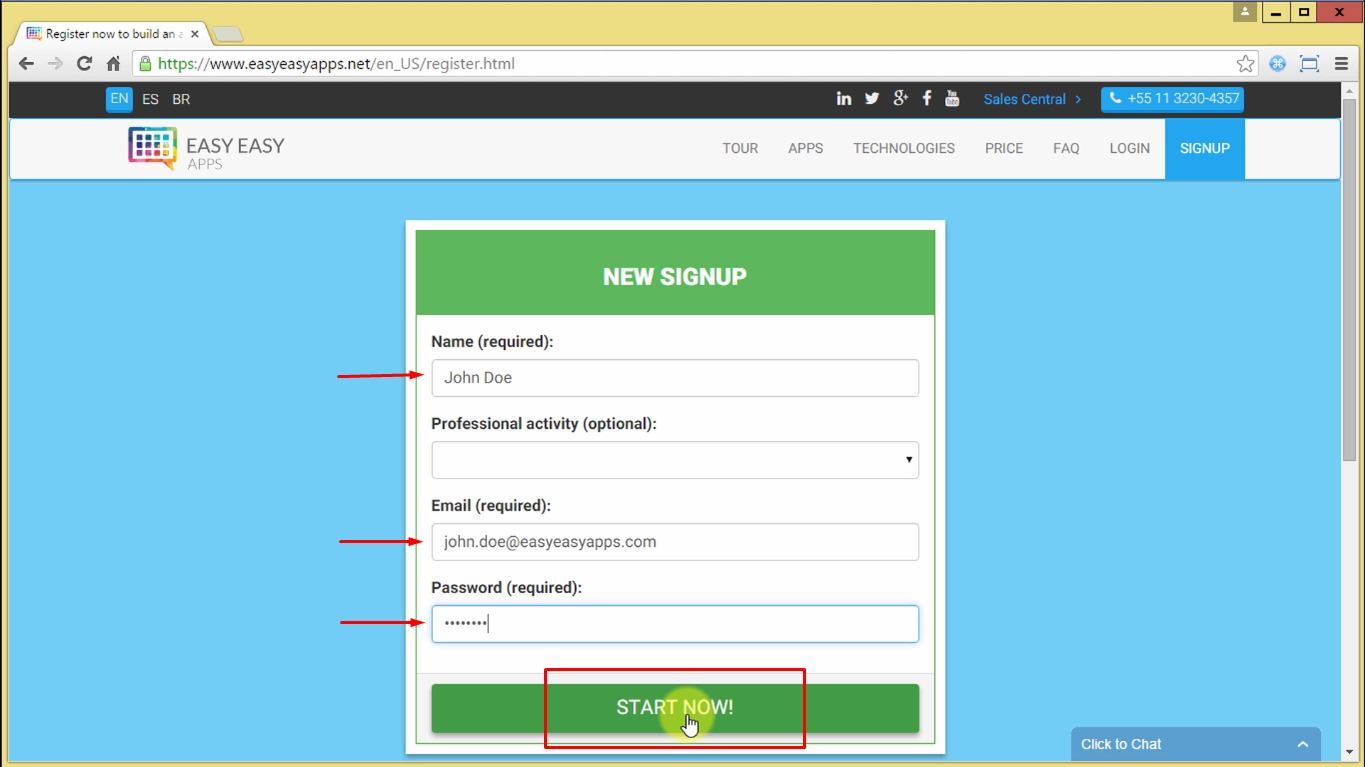
Click on the Sign Up option and provide the requested information:
- Name - This field is mandatory.
- Professional Activity - this field is optional.
- Email - This field is mandatory.
- Password - This field is mandatory.
To finish the Sign Up process and to start making your app, click on the Start Now button.
If an error shows up with the message com.easyeasyapps.common.exception.repository.NotUniqueException
, it means that you already created an account and only need to Login with your email and password.
Making your first App
You have just entered the Easy Easy Apps mobile App Maker and now you are ready to make your app. To start you just need to:
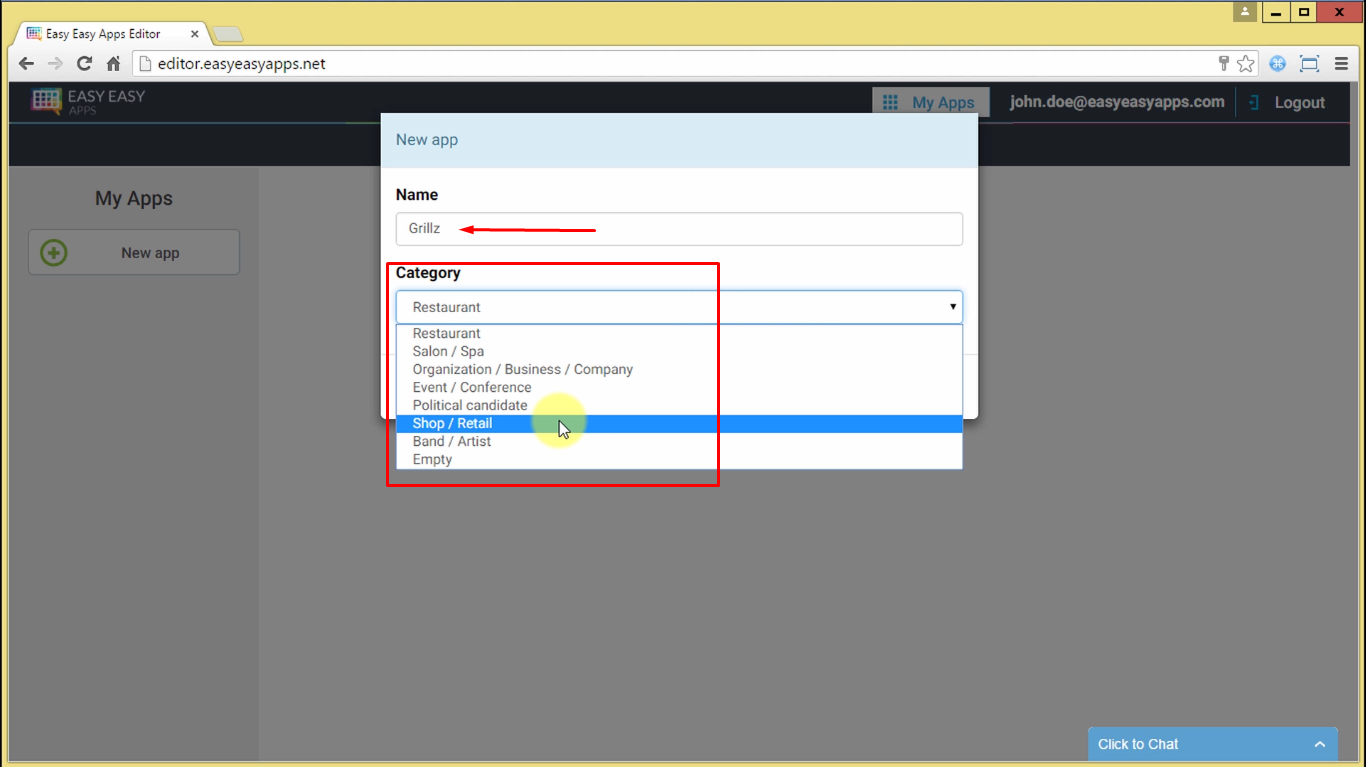
- Give a name to your App
- Choose a Category/Template
Easy Easy Apps provides several app templates to speed up the development of your new app. Choose the most appropriate template for the app you wish to create.
If you don't find any category/template related to the app you are making, choose the template Empty.
Don’t worry about this first choice, you can customize your entire app later. For this tutorial, we will choose the Restaurant category.
Preview your App in the Live Previewer
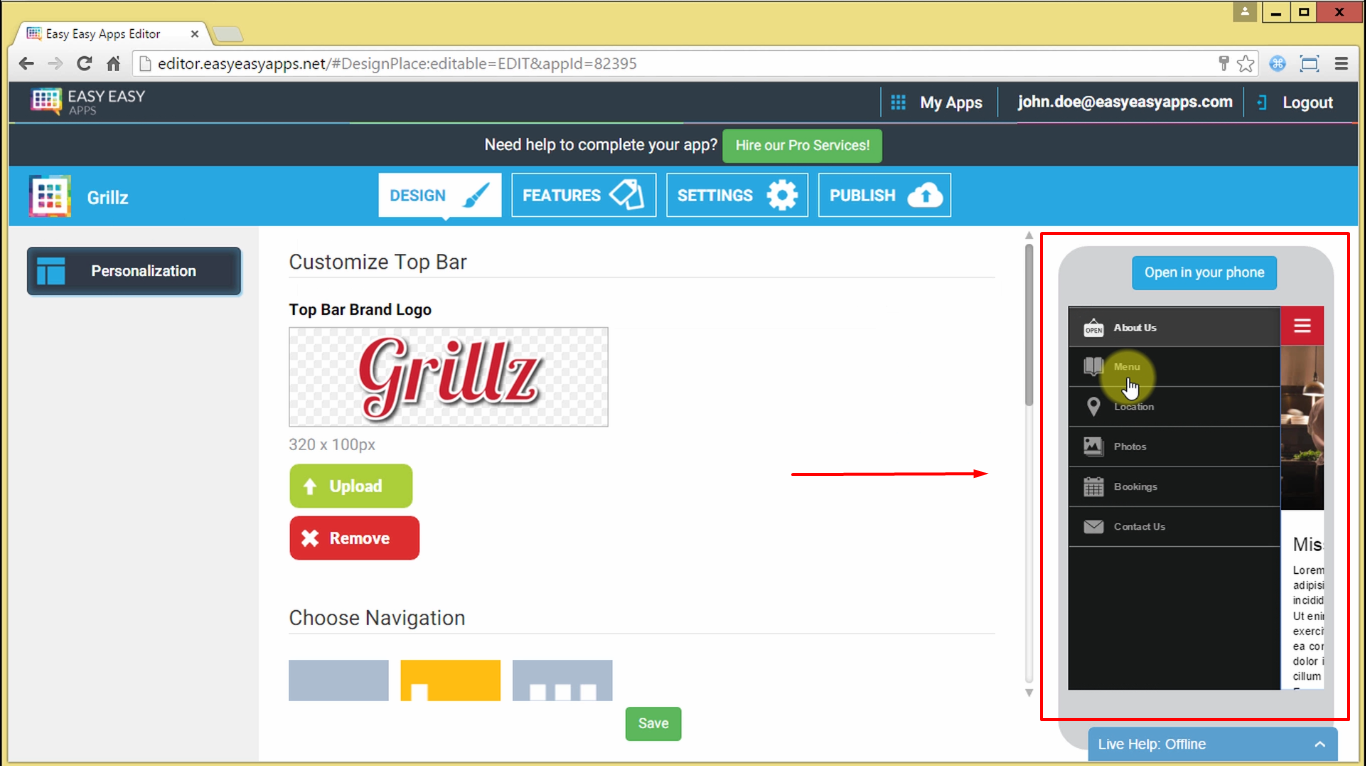
In the Live Previewer section you can preview and interact with the app you are building. Navigate through the screens, menus and content, as if you were using your new app in your mobile phone.
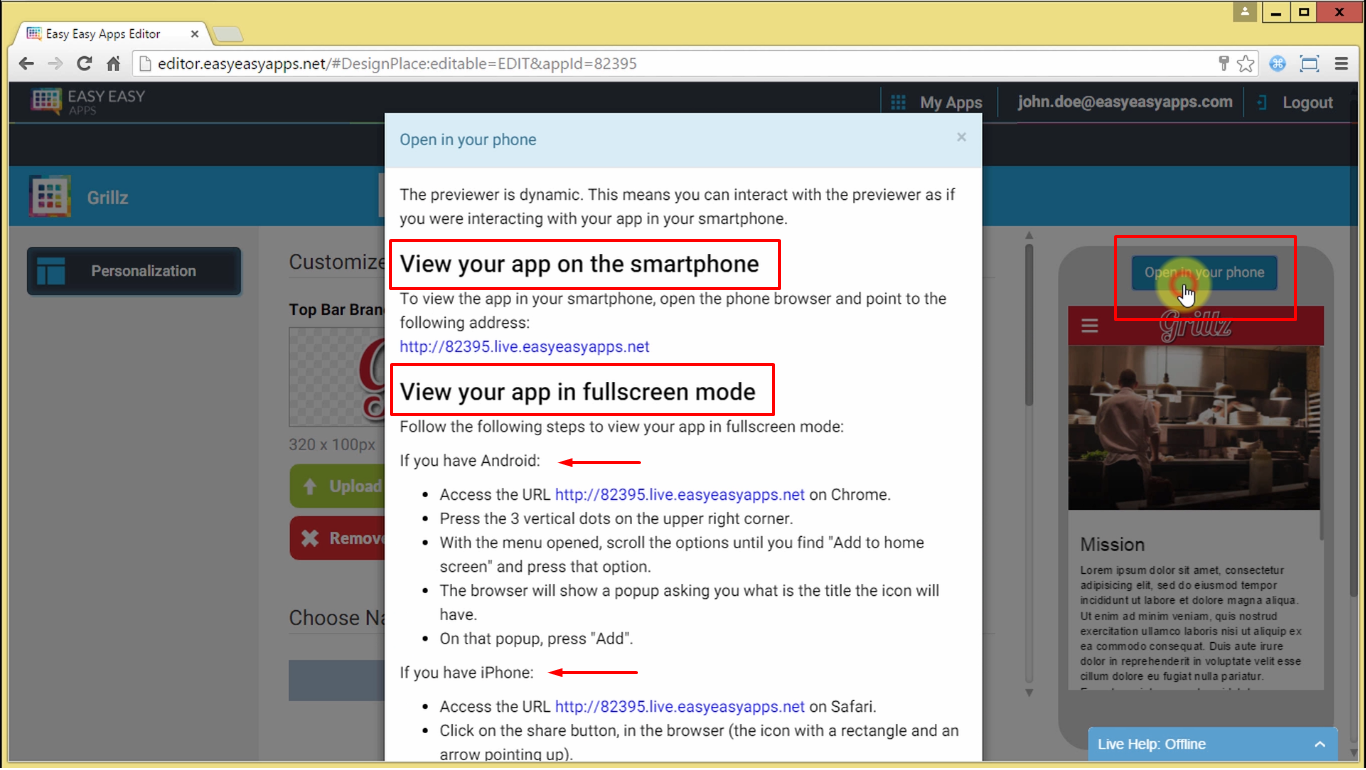
You can also click on Open in your phone and follow the provided instructions to view the app in a real smartphone. Follow the provided steps to view your app in both Android and iPhone.
The Mobile App Maker Navigation
In the App Maker’s Navigation section you can find:
- Design Tab – in this tab you can add your Brand’s logo, choose the navigation mode, and define the color scheme of your app.
- Features Tab – in this tab you can add and remove features, configure your screens, and manage the content of your app.
- Settings Tab – in this tab you can change the name and language of your app, configure push notifications and other advanced settings.
- Publish Tab – after subscribing to an Easy Easy Apps plan, you will be able to publish your app in Google Play and Apple App Store.
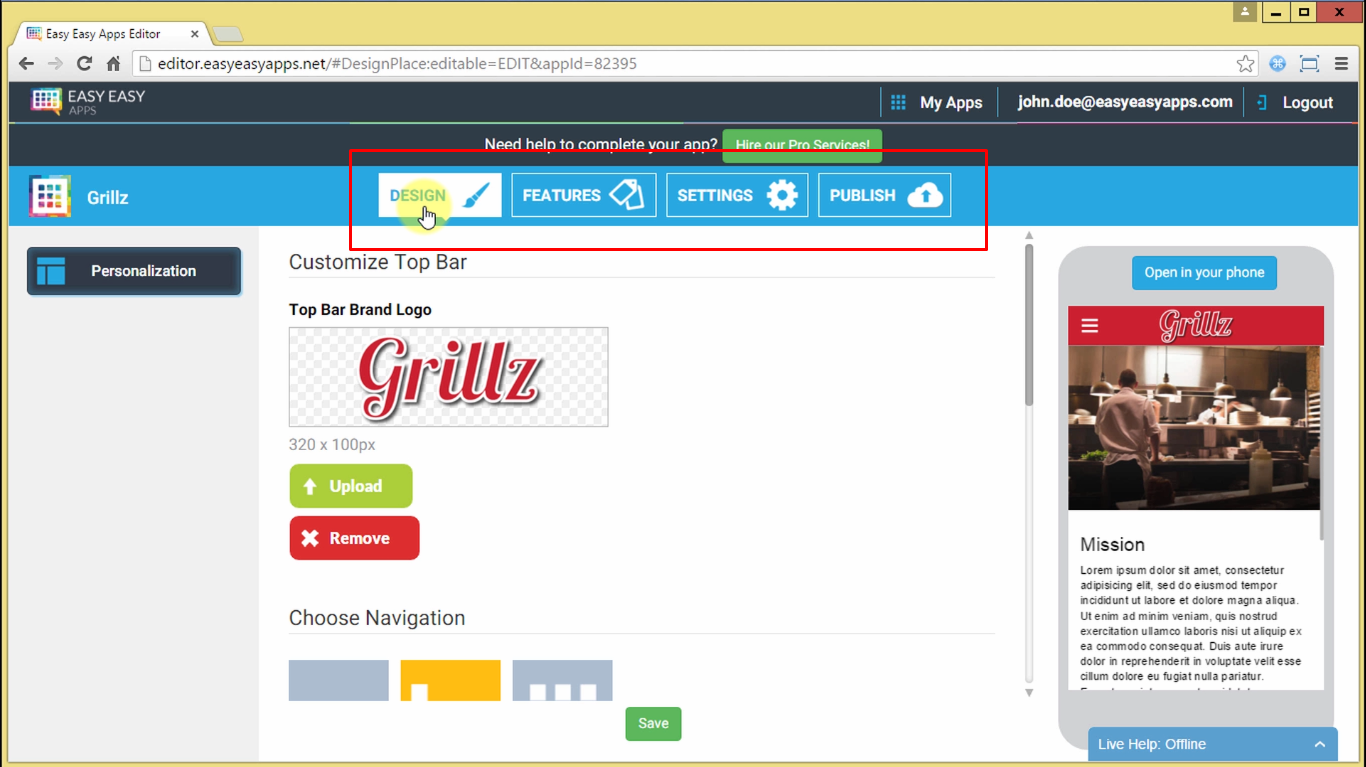
Design Tab: Logo, Navigation and Colors
In the Design tab you can upload your company logo. You can see how it will look in the top bar of your app in the live previewer.
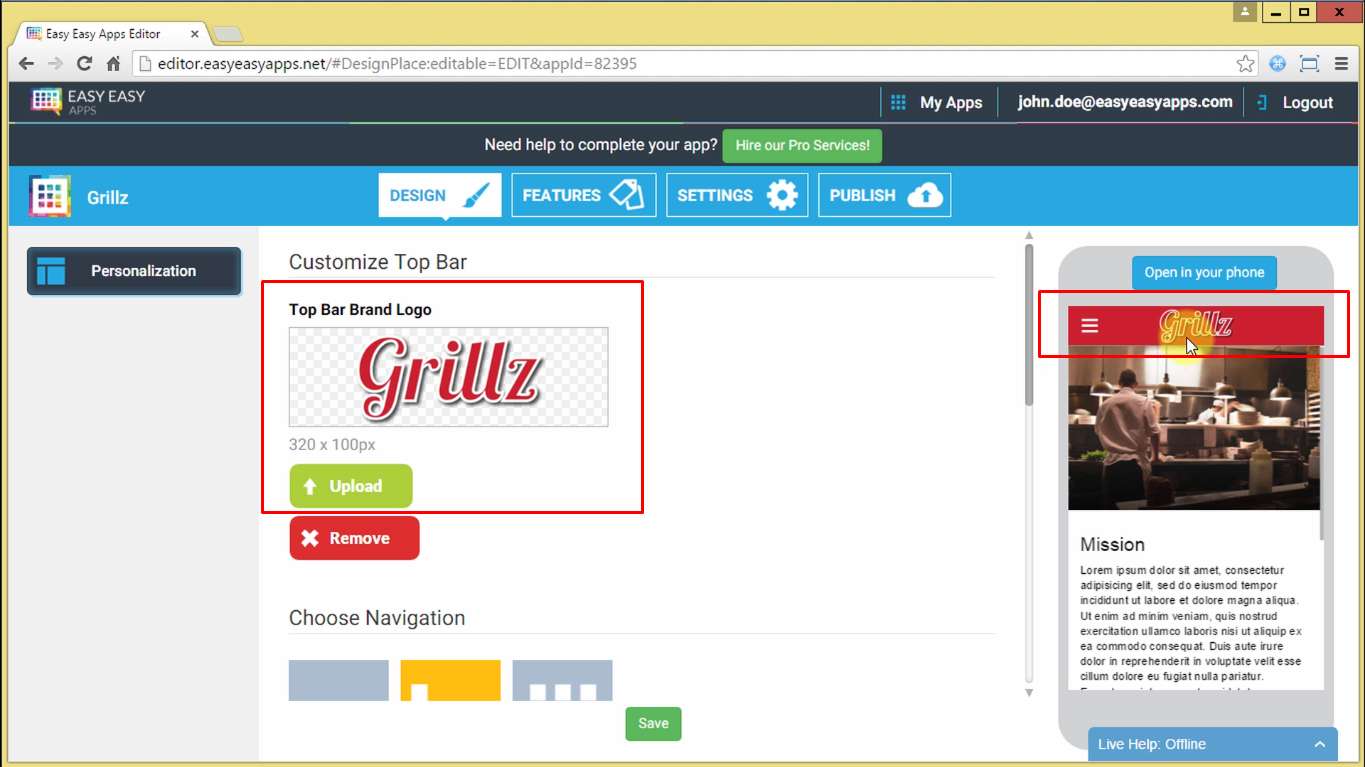
In the Navigation section you can choose between Horizontal, Lateral or Grid navigation modes:
- Horizontal – the navigation bar will always be visible at the bottom of your app’s screen
- Lateral – the navigation will be visible when you press the Menu button at the top of your app's screen
- Grid – the app’s first screen is fully dedicated to the navigation of your app
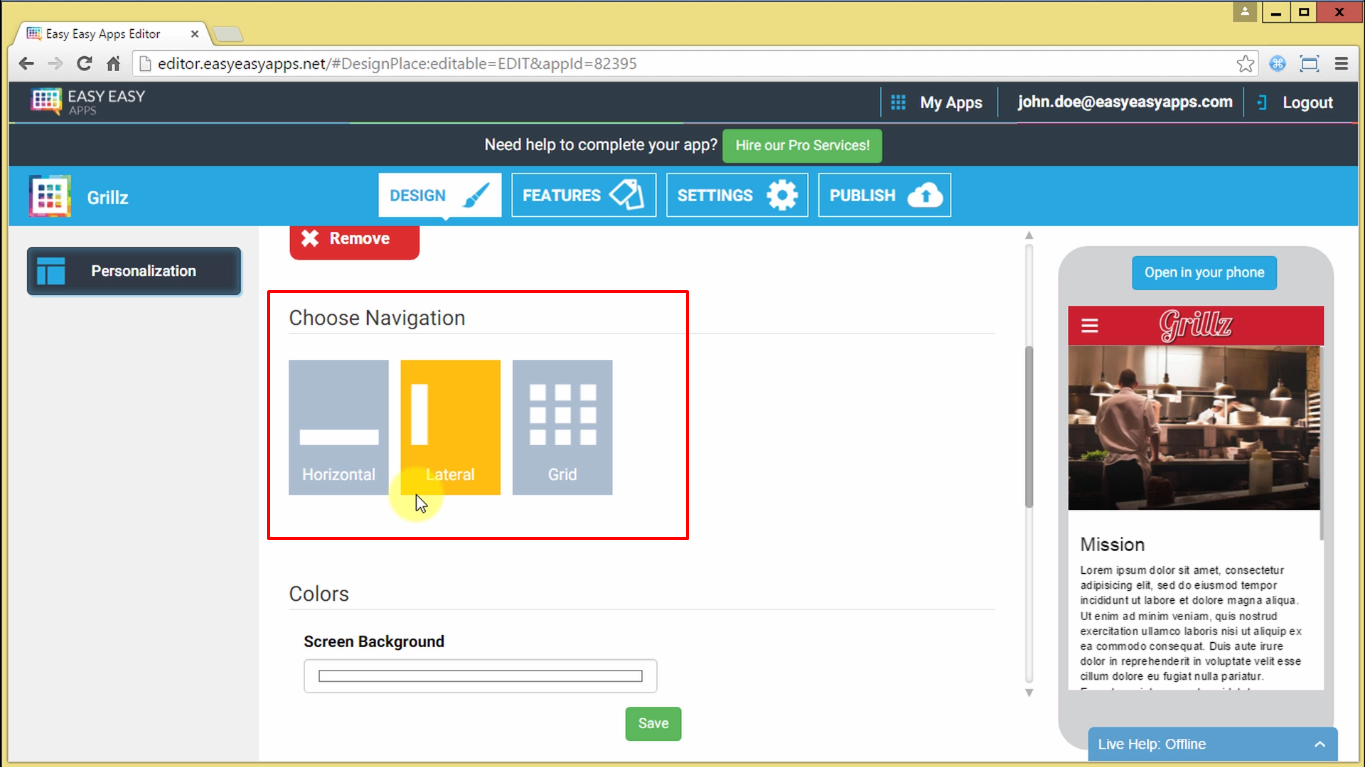
In the Design tab you can also configure all of the colors of your app, ranging from the background color to the text and button colors.
Click on the color you wish to change and then click on the new color that you prefer. You can see your changes in the Live Previewer.
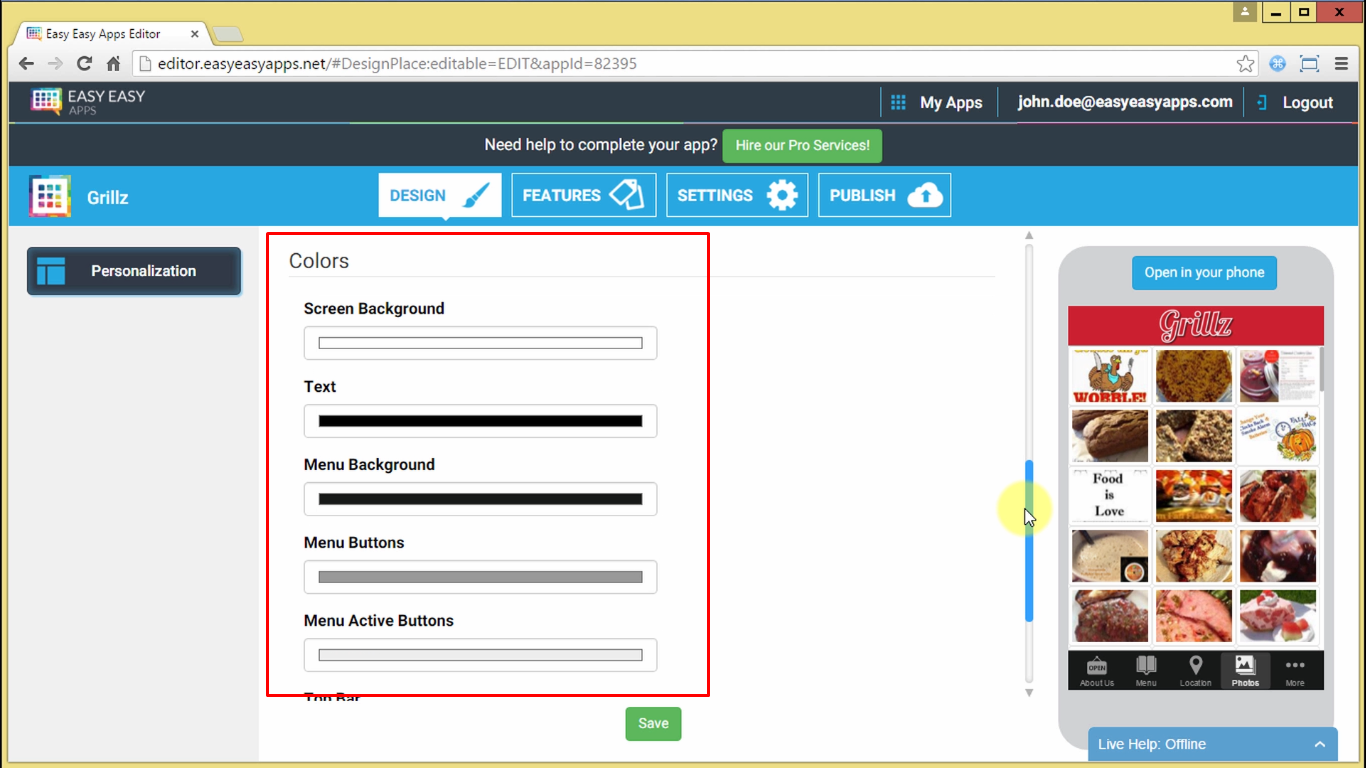
Features: Content and App Screens
In the Features tab, you can see all the features that you’ve chosen for your app. By clicking on them, you can preview and interact with each feature in the Live Previewer.
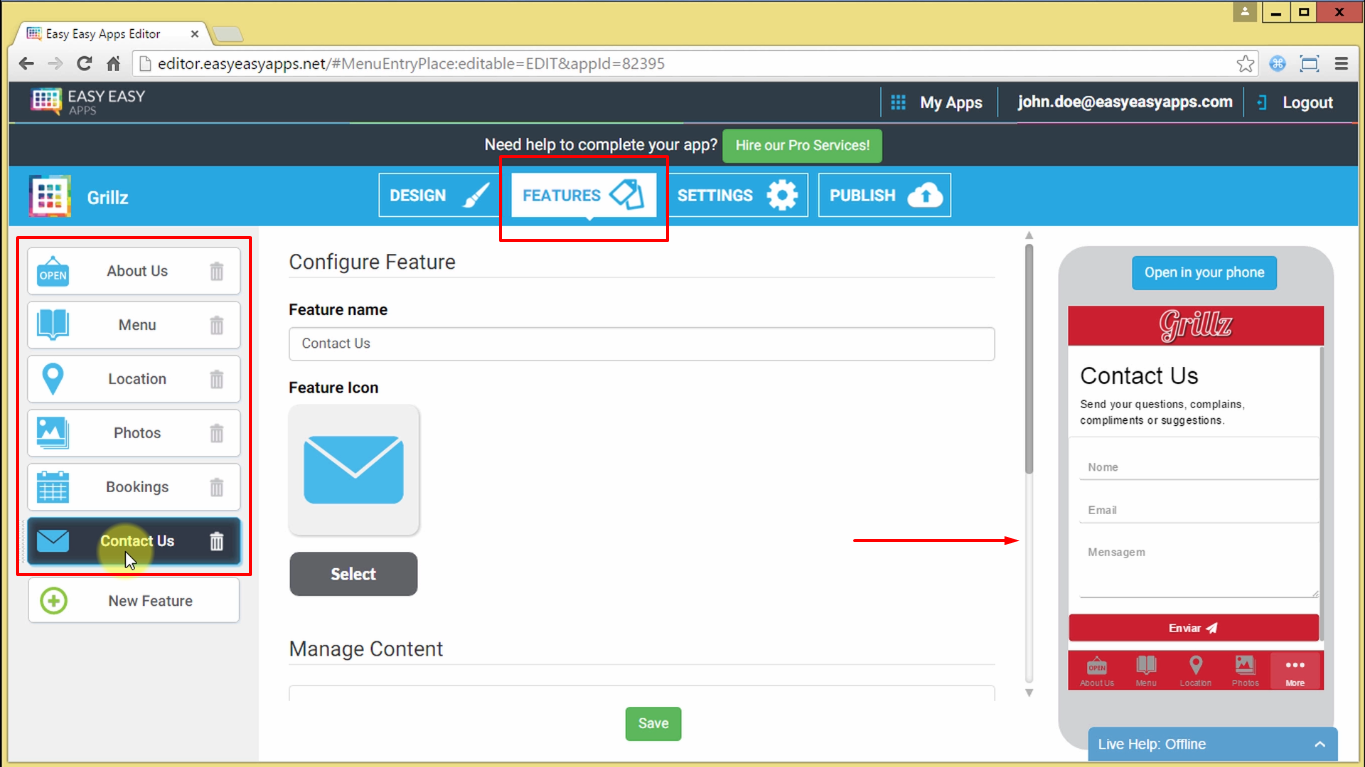
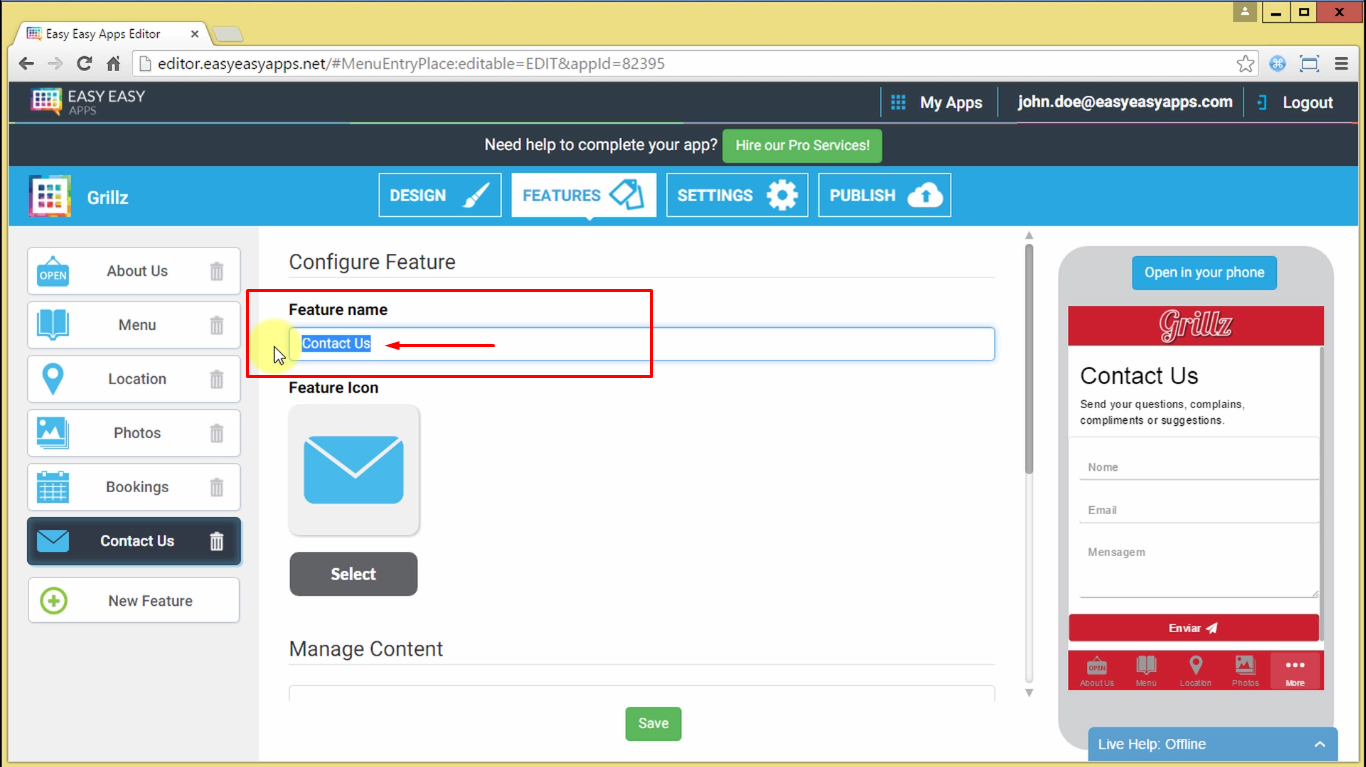
You can change the name of the feature by clicking in the Feature name text box and inserting the desired name. We recommend using an easy to read short name.
Choose a good icon for your feature. The icon should be related to the content, this way it will be easier for your users to know what feature to use.
Remember that you can preview your modifications in the Live Previewer.
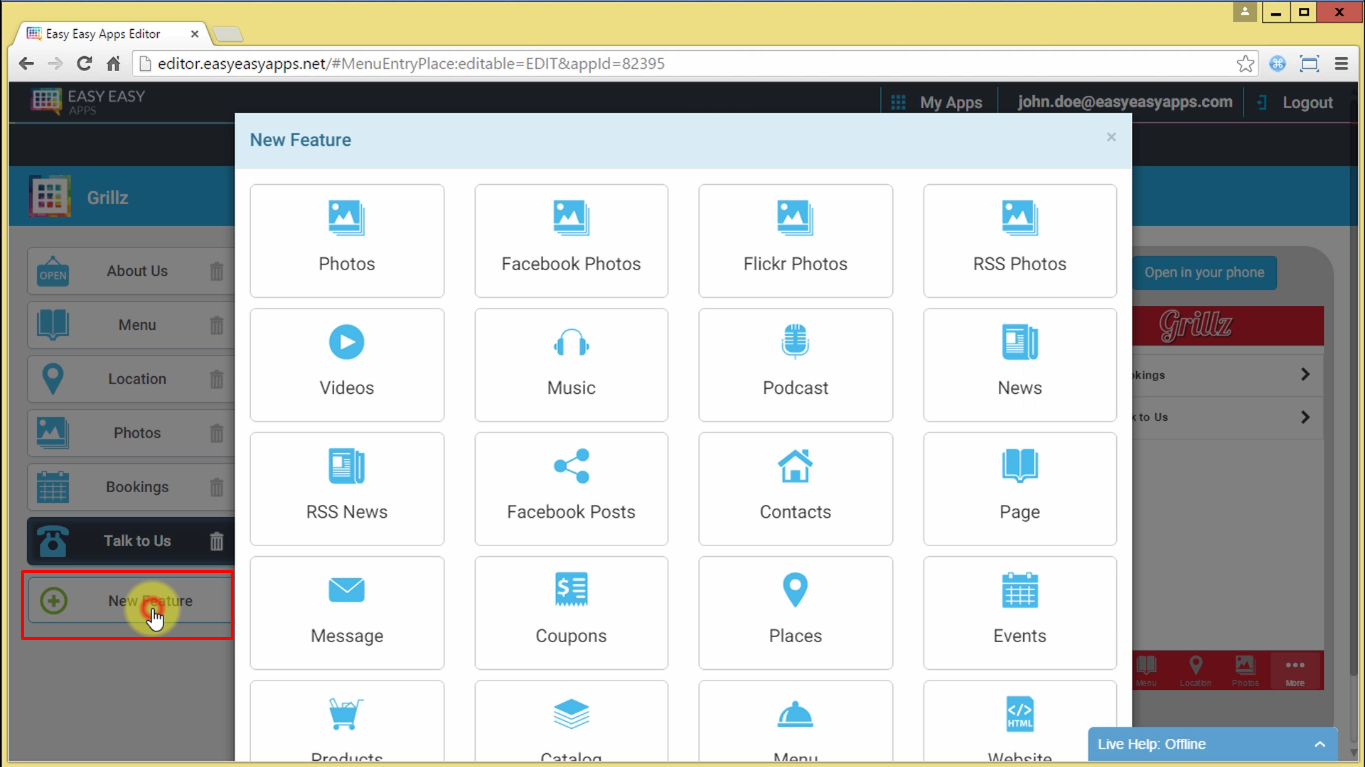
Click on the New Feature button to add new features to your app. Easy Easy Apps has an extensive list of Features that you can use in your app, choose the one that best fits your case.
After adding a new feature, you can immediately view the new screens in the Live Previewer.
Publish your app in Google Play and Apple App Store
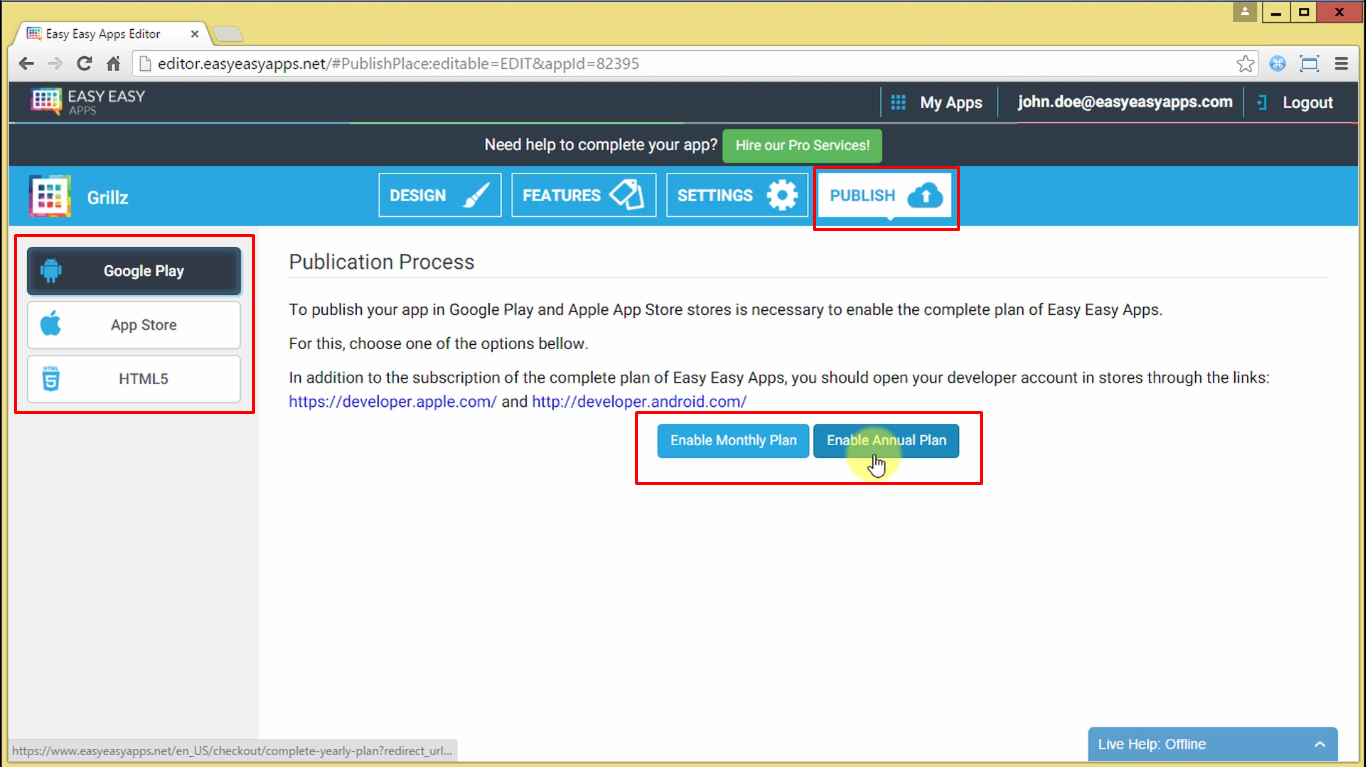
In the Publish tab, you can view the different platforms for which you can publish your app as soon as you subscribe to an Easy Easy Apps Plan.
To subscribe, choose the Monthly subscription, where you can pay monthly without any commitment; Or the Annual subscription, where you get for 10 months and get a 12 month subscription.
You can see all the details about the Easy Easy Apps Plans in our Princing page.
Congratulations! Now that you've read our tutorial you are ready to turn your ideas into a real project. Don't waste any time, start right now!
Thank you for watching this tutorial, leave your comments and we will contact you.
Don’t forget to share!