In this tutorial we will show you how to display information about your business, its location and set up a contact form so your app users may contact you directly.
The Page Feature
The Page feature allows you to display your business information to your app users.
This feature is especially useful to inform your customers of your service working hours, your business mission and values, and your products or services.
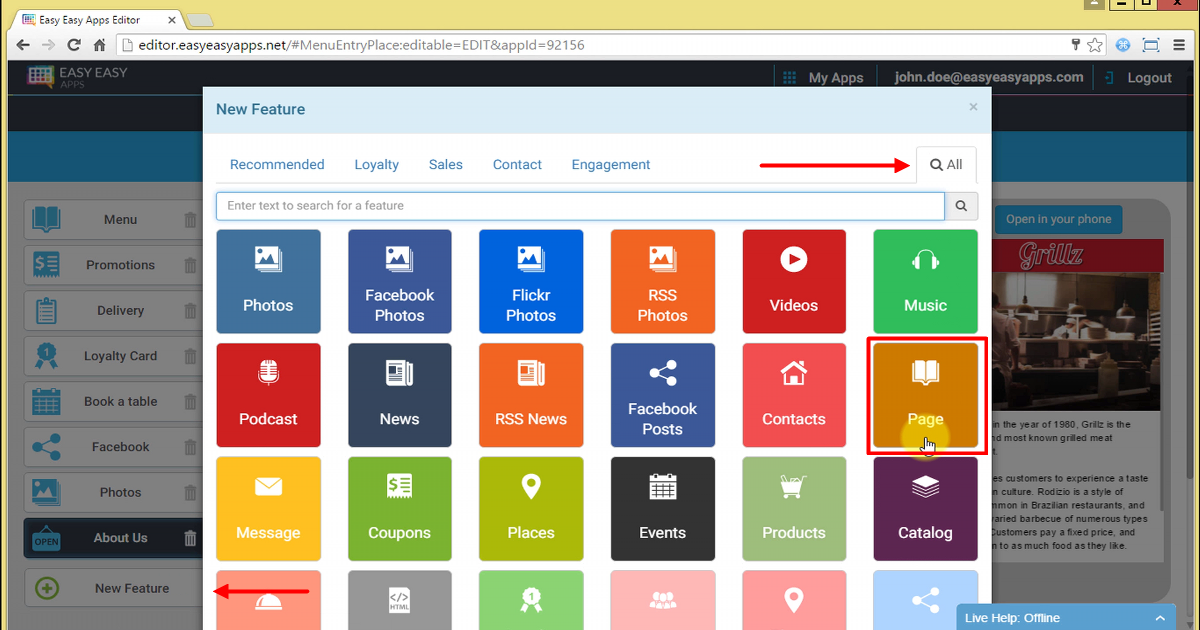
You can use this feature on several app screens. To start, press New Feature, select the All tab and choose Page.
To set up this feature information, you can start by entering the feature name.
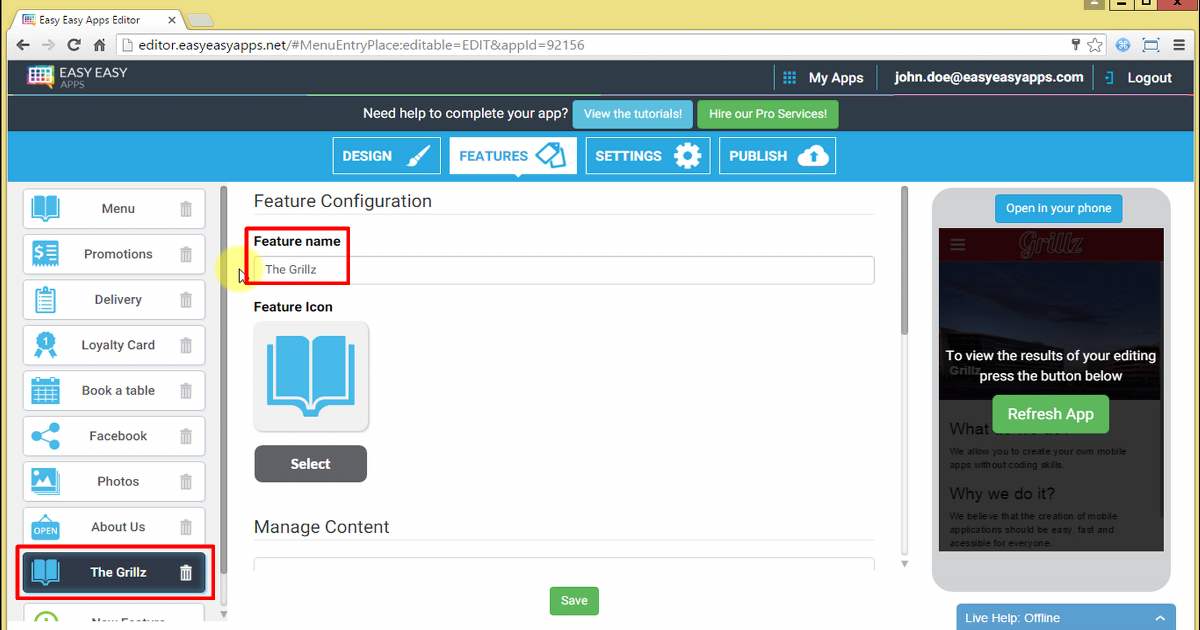
And choose a suitable icon.
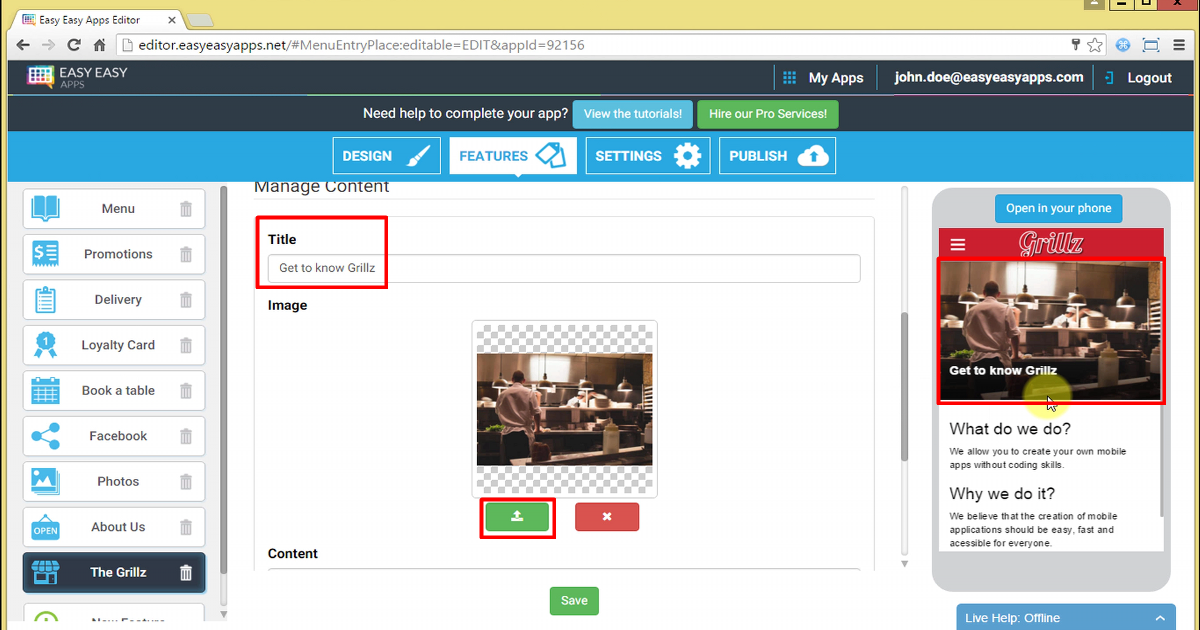
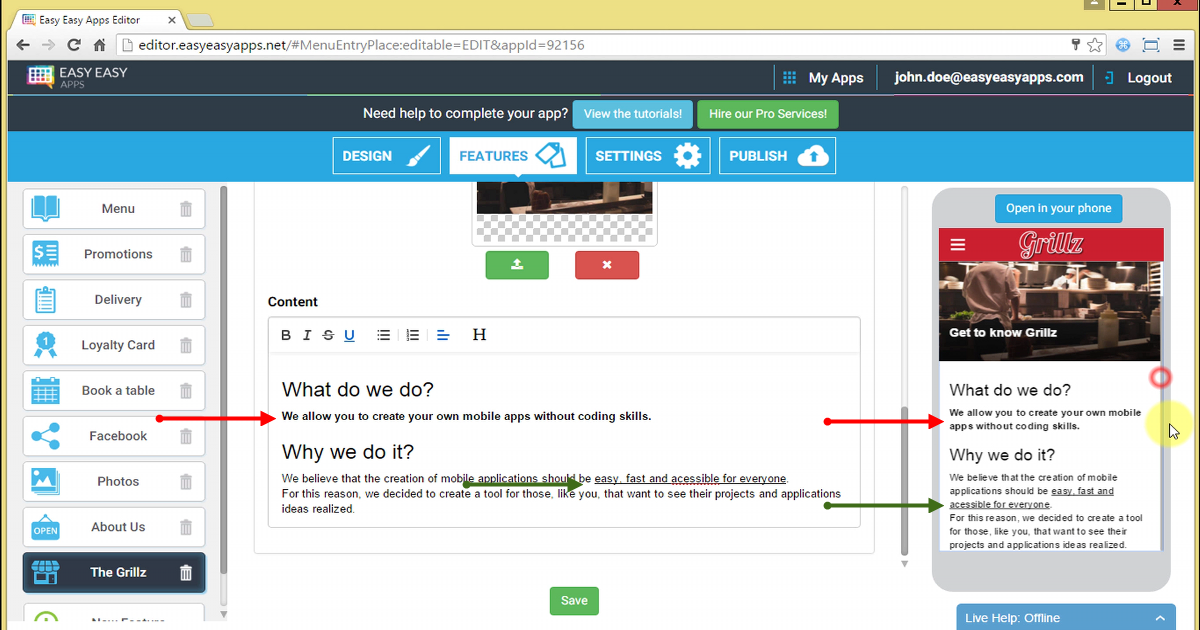
Next, enter the screen title and add an image that represents your organization.
To add a photo, press the upload button and choose a file from your computer.
In the content field you can include text or HTML. Here you can include titles, create lists, and style the text.
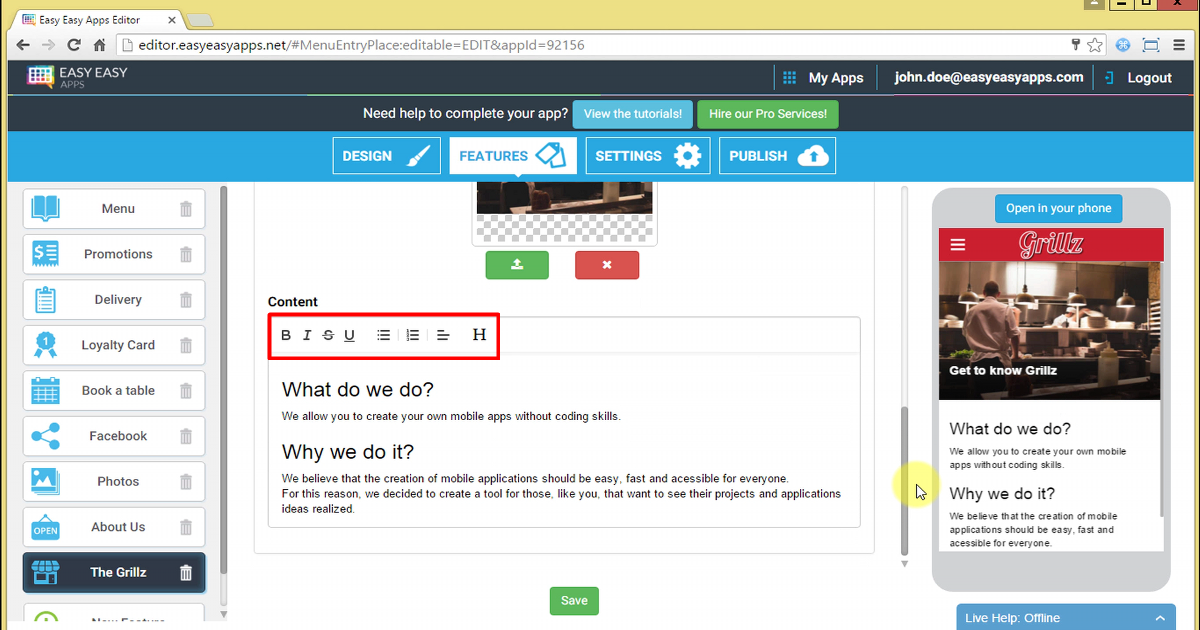
Anytime you change the feature content, you can immediately see how it will appear in the Live Previewer.
The Message Feature
The Message feature allows you to create a contact form to receive the app user’s information by email.
The contact form allows you to receive suggestions, comments, simple scheduling requests, reservations, or quote orders through your app.
To add this feature to your app press New Feature and choose Message.
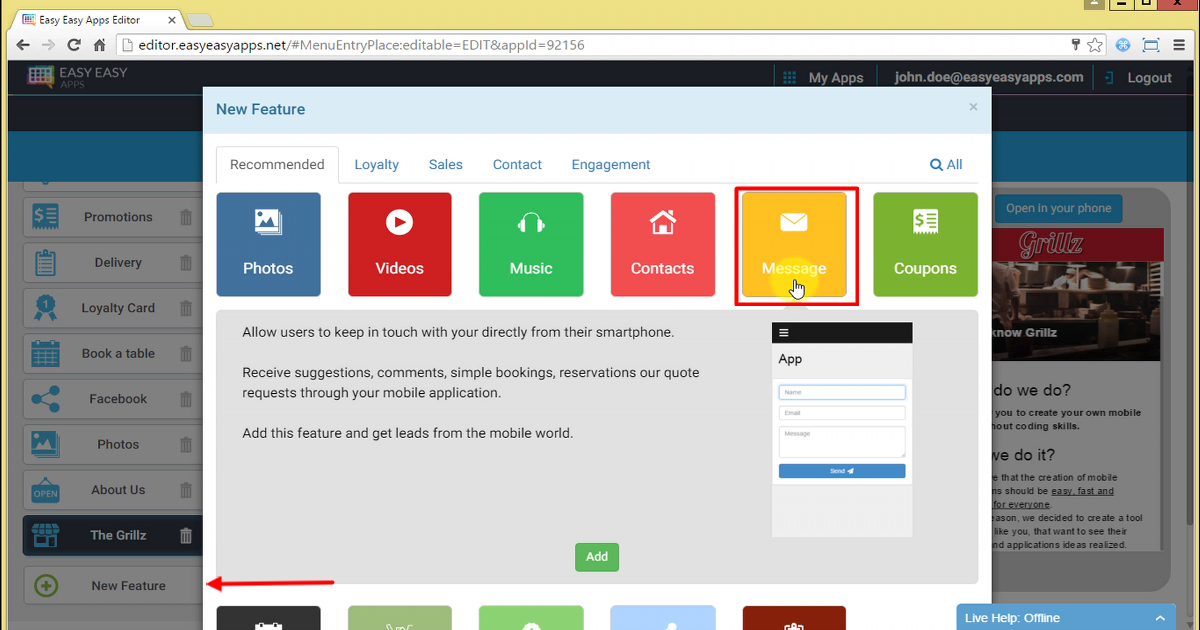
To check how the app user will see the contact form, look to the Live Previewer.
In this form the user will be able to enter his name, email and a message.
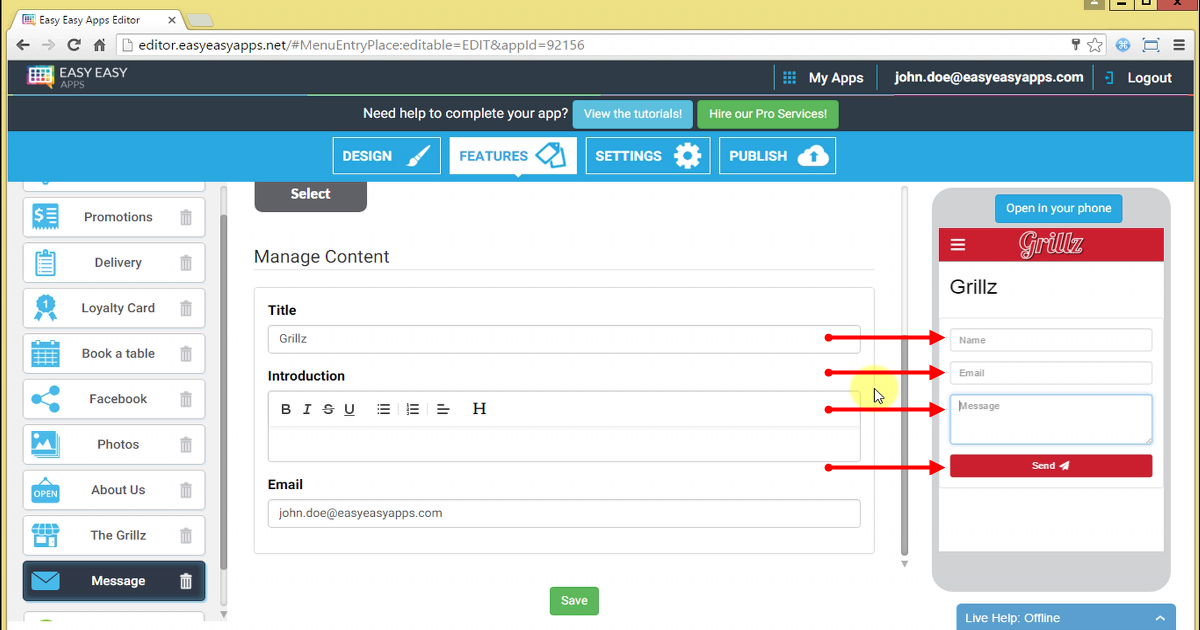
When the user presses the Send button, you’ll receive an email with the information that the user entered. Meaning, you’ll receive the name, email and message that the user entered in the form.
The user’s name and email will allow you to communicate with the app’s user, while the message field will allow you to see the request or comment that the user made.
Now that we saw how the contact form works, let’s see how to configure it.
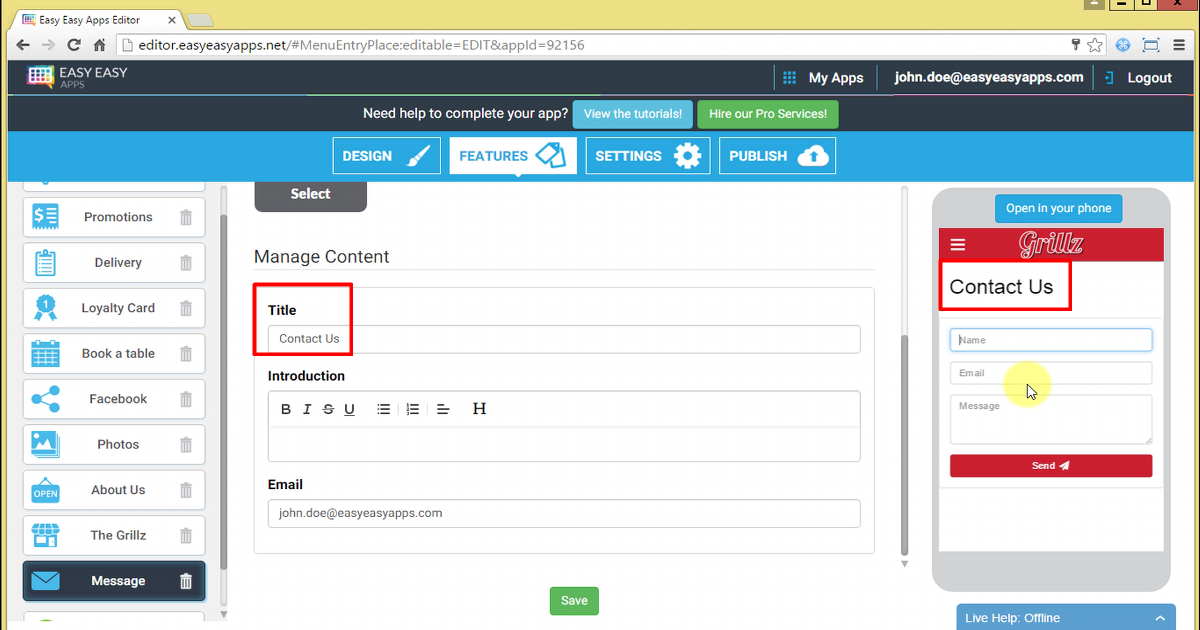
The title field is the information that the user will see on top of the form.
The title should be the action that the user must do, for example, “Leave your suggestions” or “Contact Us”.
Pay close attention to the email field in the “Message” feature configuration. It indicates where the users’ messages will be sent.
For example, if this field contains contact@easyeasyapps.com, when the user opens this feature and fills out name, email and message, the app will send an email with that information to contact@easyeasyapps.com.
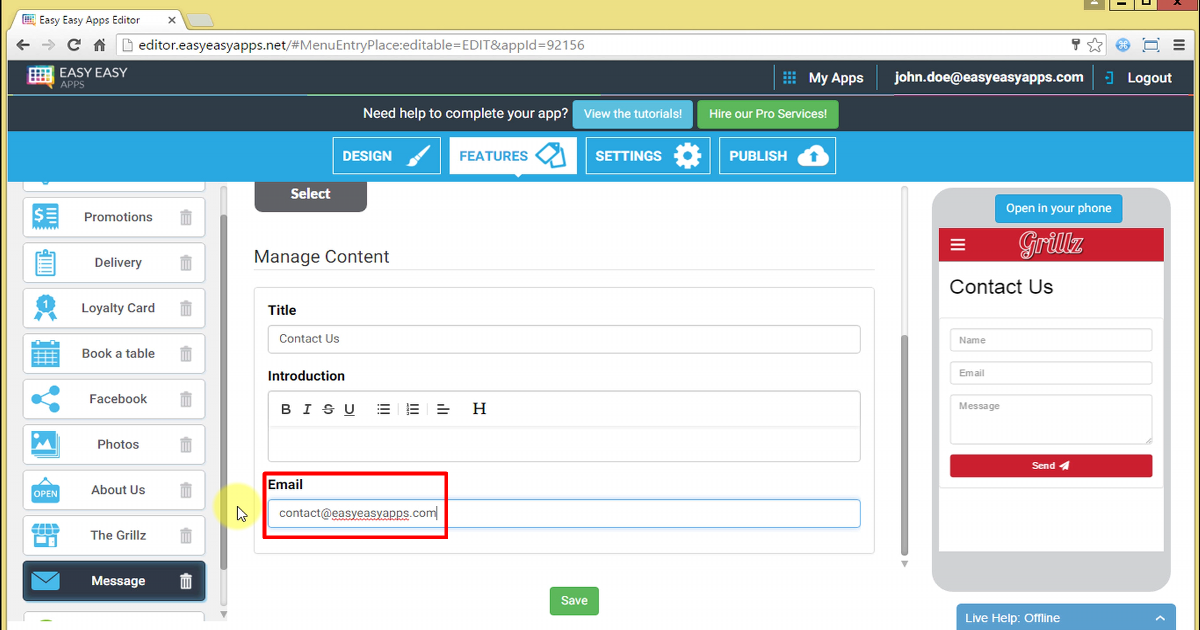
Finally, the introduction field allows you to give more guidance on the contact form.
For example, you can include your response policy to comments and suggestions received, or what the user should type in the message field.
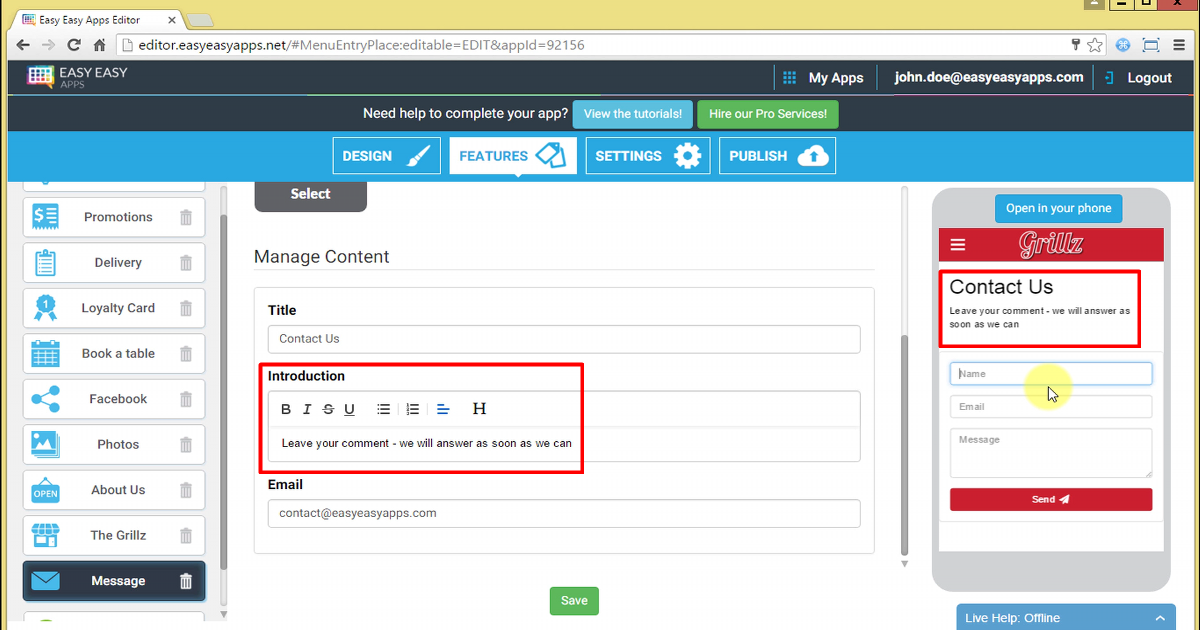
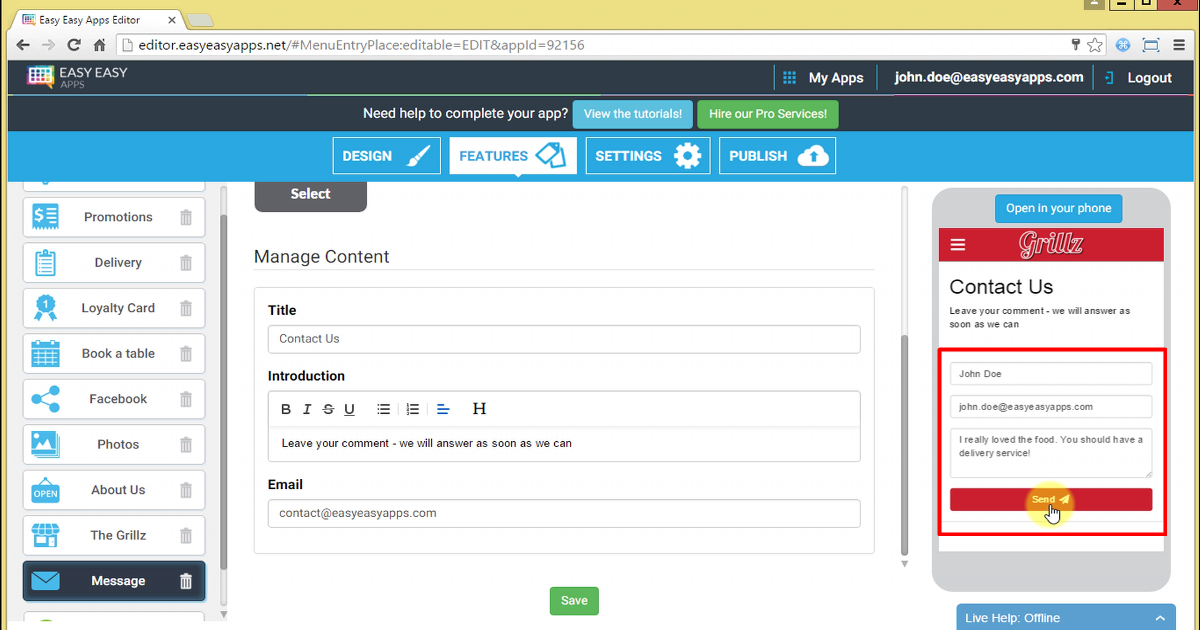
Try the Message feature for yourself by entering your email in the content area. Go to the Live Previewer and fill out the form simulating a user contact.
You can try the Message feature for yourself by going to the Live Previewer and filling out the email form. You are simulating a user contact.
For you to understand correctly the difference between the email fields, you should use an email address in the contact form different from the one used in the feature configuration. Press Send.
The Contacts Feature
The feature Contacts allows you to bring your business closer to your customers. This feature is especially important so the app user knows how to reach you and what direct forms of contact you have.
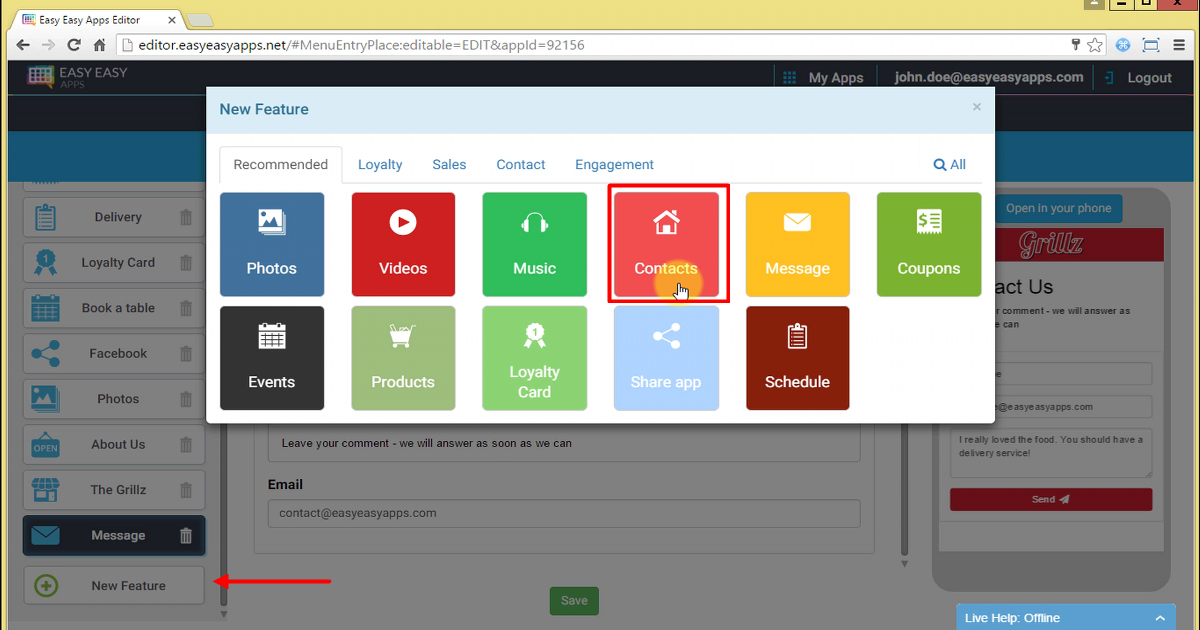
To add this feature to your app, press New feature and choose Contacts.
The title field should be the name receiver of the contact information, usually it’s the organization name. If you don’t want to display a title, leave this field blank.
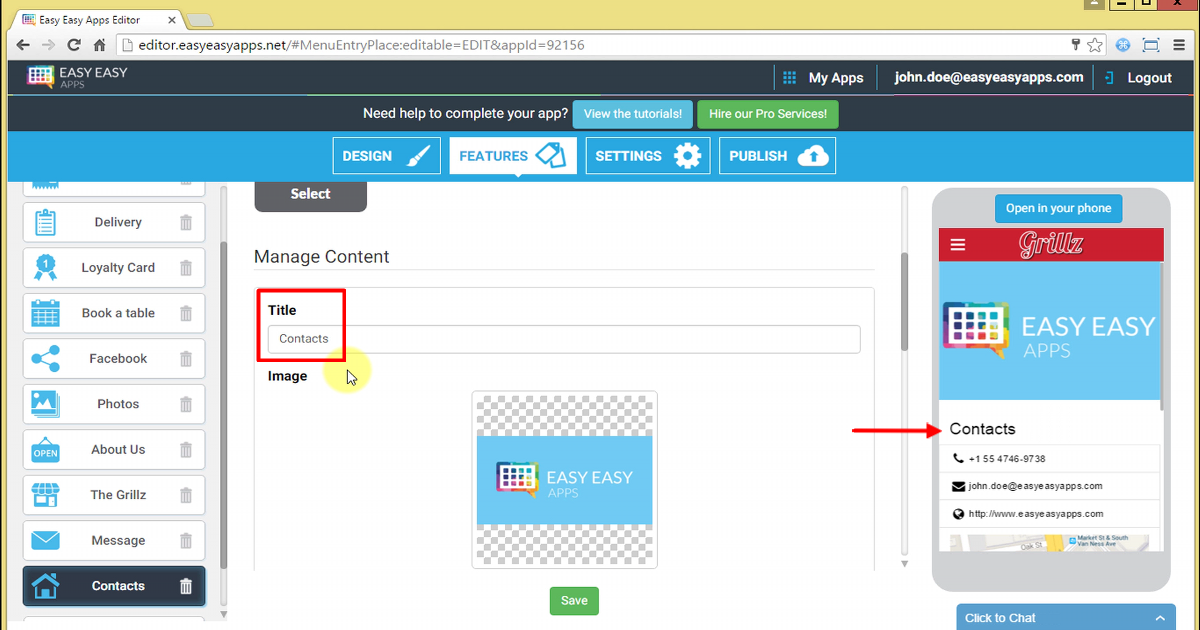
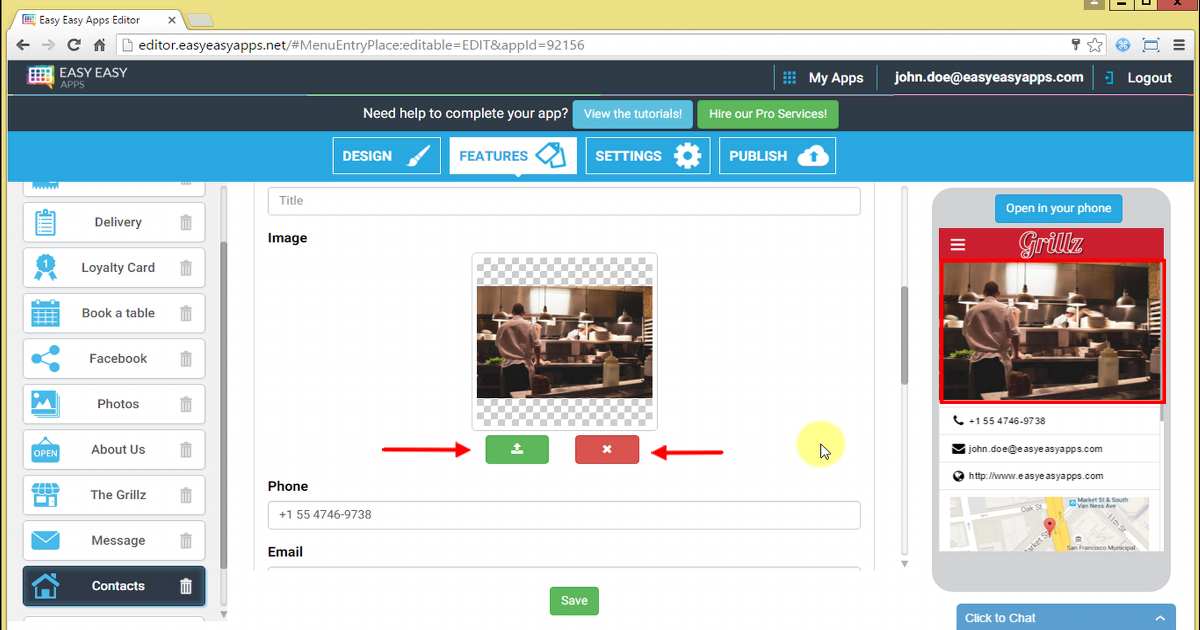
The image should be related to your organization and, the more appealing it is, the more impactful and successful the Contacts feature will be on your app.
Don’t worry about the dimensions. The image will adjust to the mobile phone screen without distorting.
If you don’t have a good image to show, you can erase it by pressing the "x" button next to it.
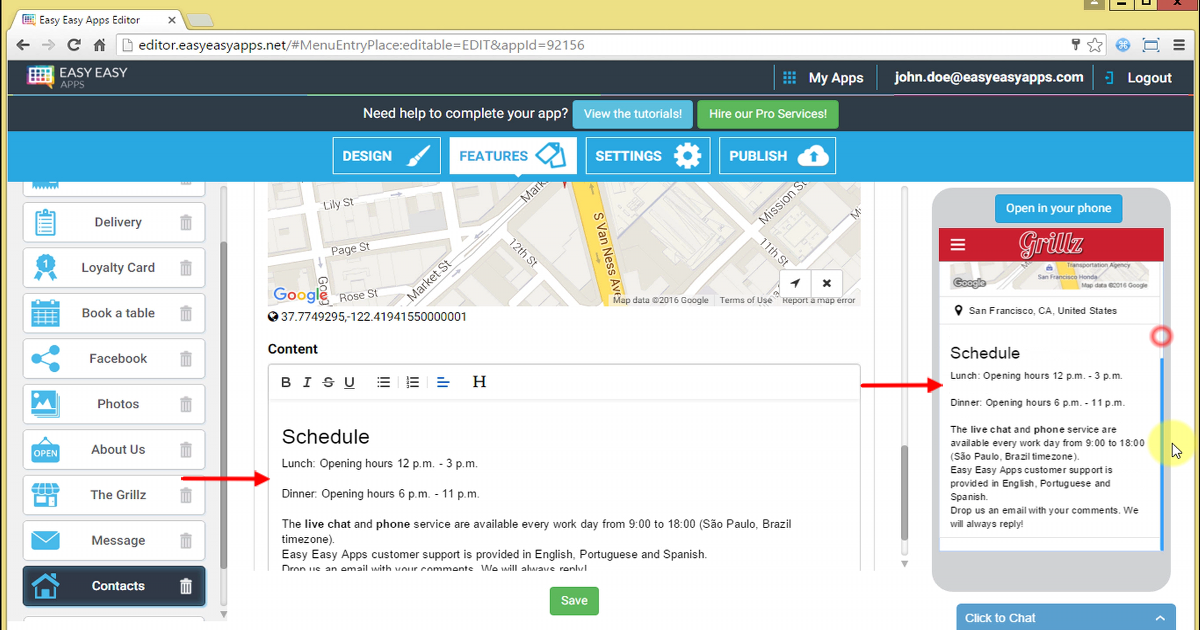
In the Content field you can include specific information about your organization.
For example, the opening and closing hours or if your business is open on weekends. If you want you can add titles, create lists and style the text. You can also leave this field blank if you don’t want it displayed in your app.
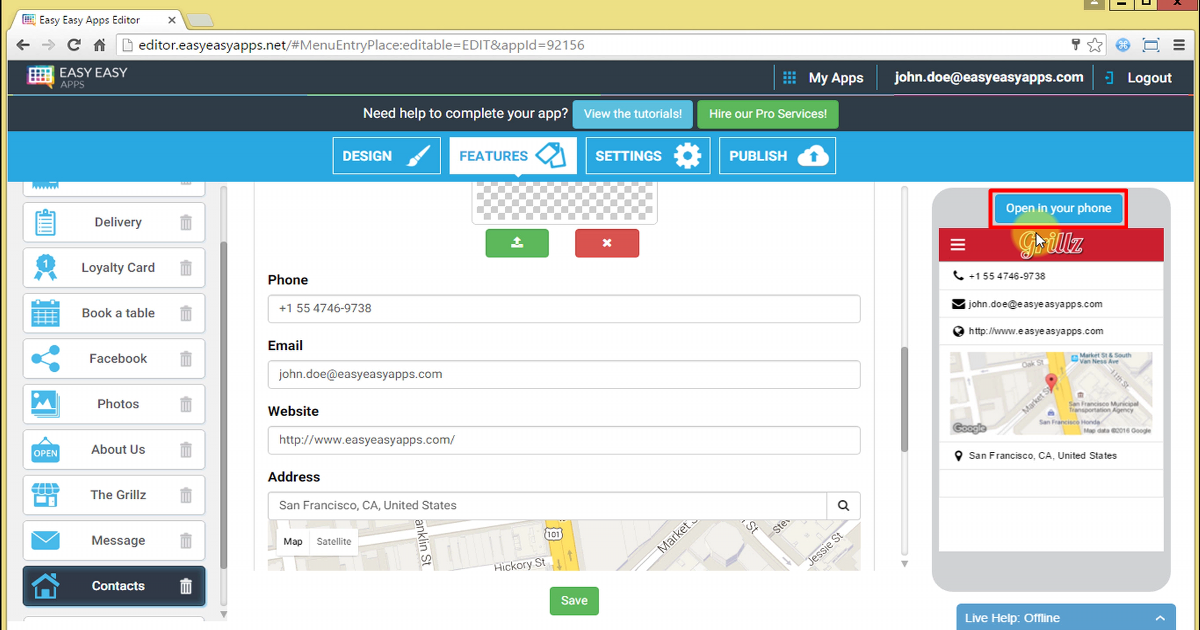
The phone number should be your business contact. The phone number field will work with a click to call in the mobile phone. This means that the user simply presses the phone number and the mobile phone will automatically make a call to the configured phone number.
Enabling the “click to call” in your app is very important. A recent Google study has found that 70% of users searching on mobile use “click to call” to contact organizations.
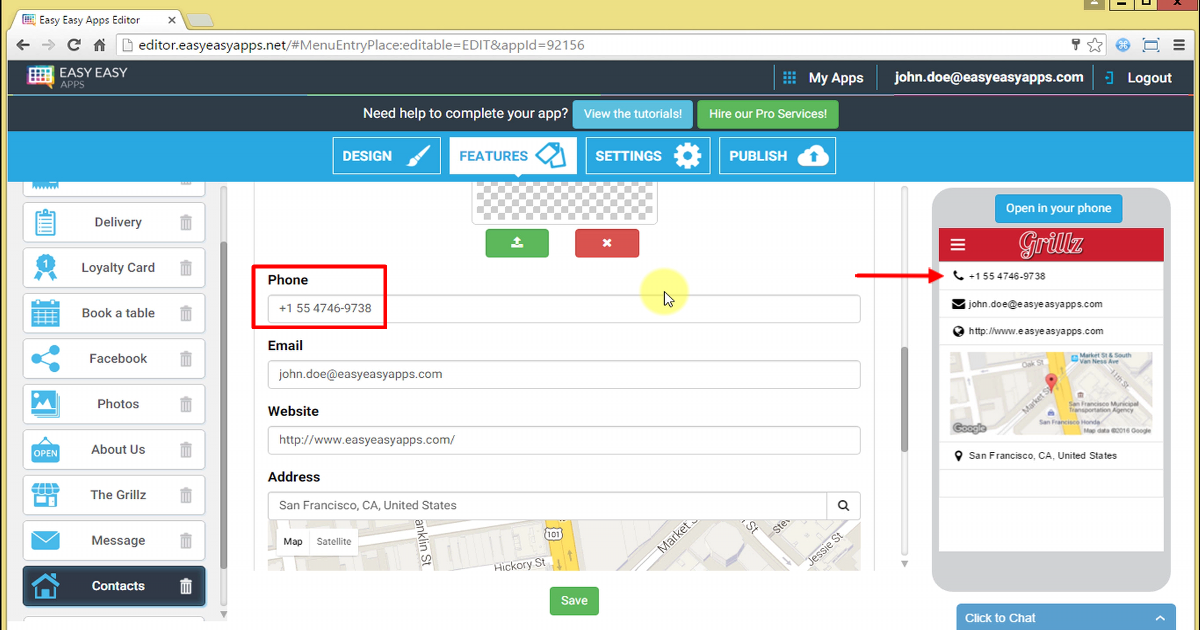
So that the click to call works smoothly in your app, you should include the country code in the phone number. If the user has an international number, that way he will be able to make a direct call for you. When entering your phone number, you can use spaces and dashes to display the number in a friendlier way.
To test the click to call option, open the app in your Smartphone by pressing the open in your phone button and follow the instructions.
If you don’t have a phone number, leave this field blank and it won’t be displayed in your app.
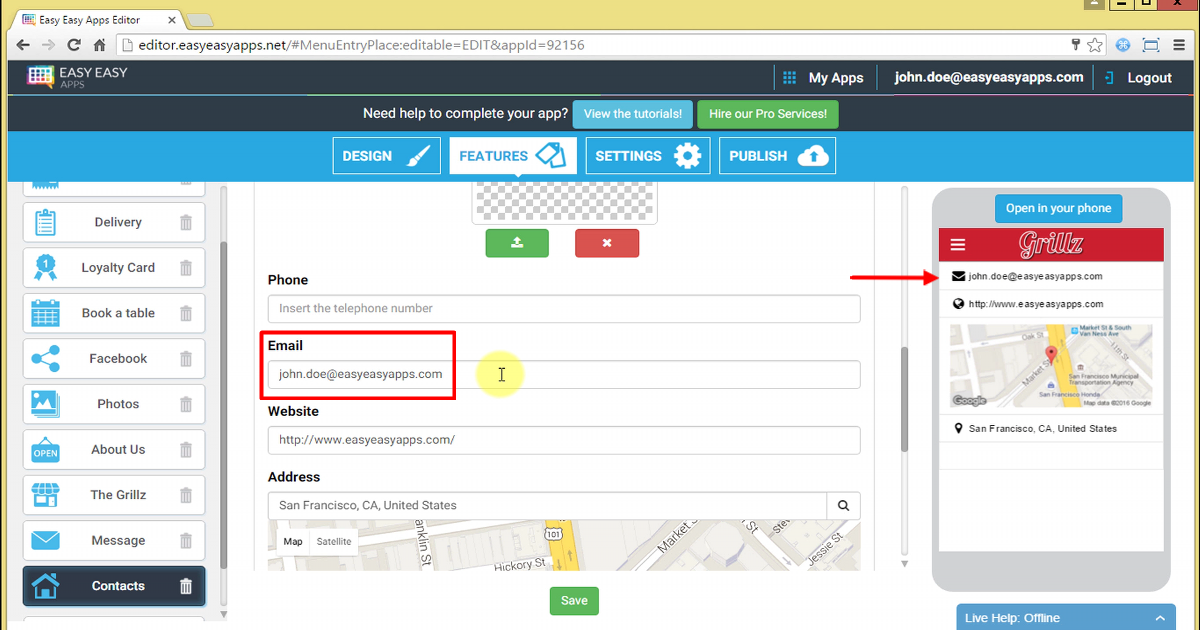
The email field allows the app user to communicate with you, through email, in a click. For that, you should configure the email field with the address where you want to receive the users’ messages.
If you don’t want to offer your app users the possibility of contacting your business through email, you should leave this field blank.
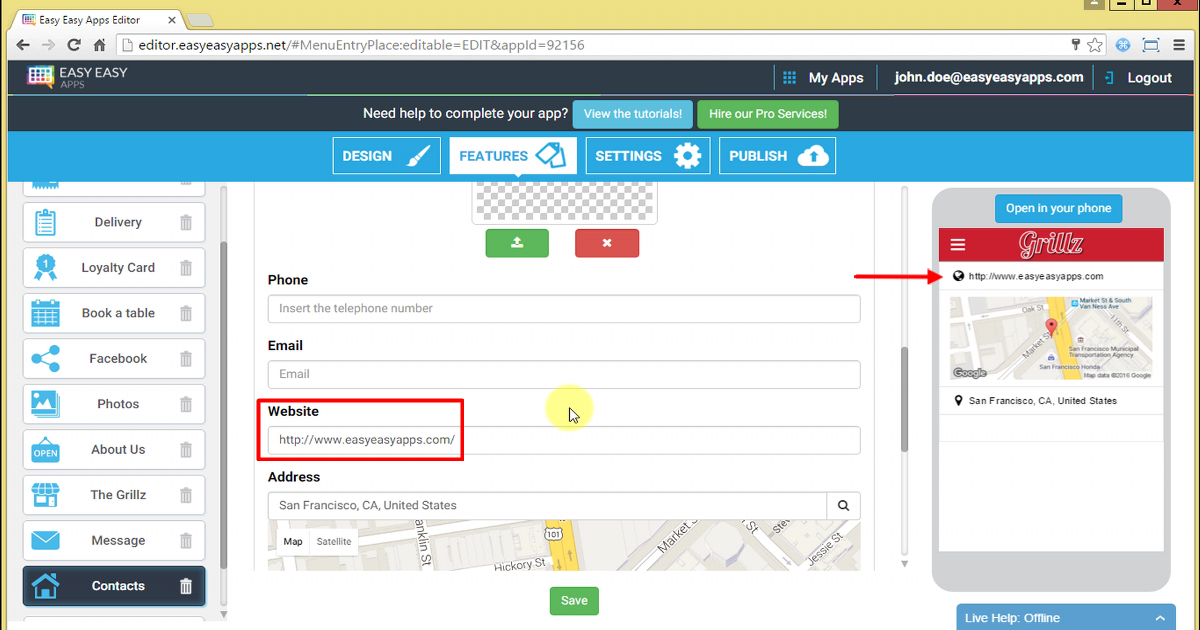
The Website field allows you to enter a link to your site. When the user presses that link in his Smartphone, the browser will be opened with your website address.
If you don’t want to display your website link, erase this field content and it won’t be displayed in your app.
The address field allows the users to see a map with your business location and its complete address.
This feature allows you to offer the app users a simple and quick way to get directions to the configured location in just a click.
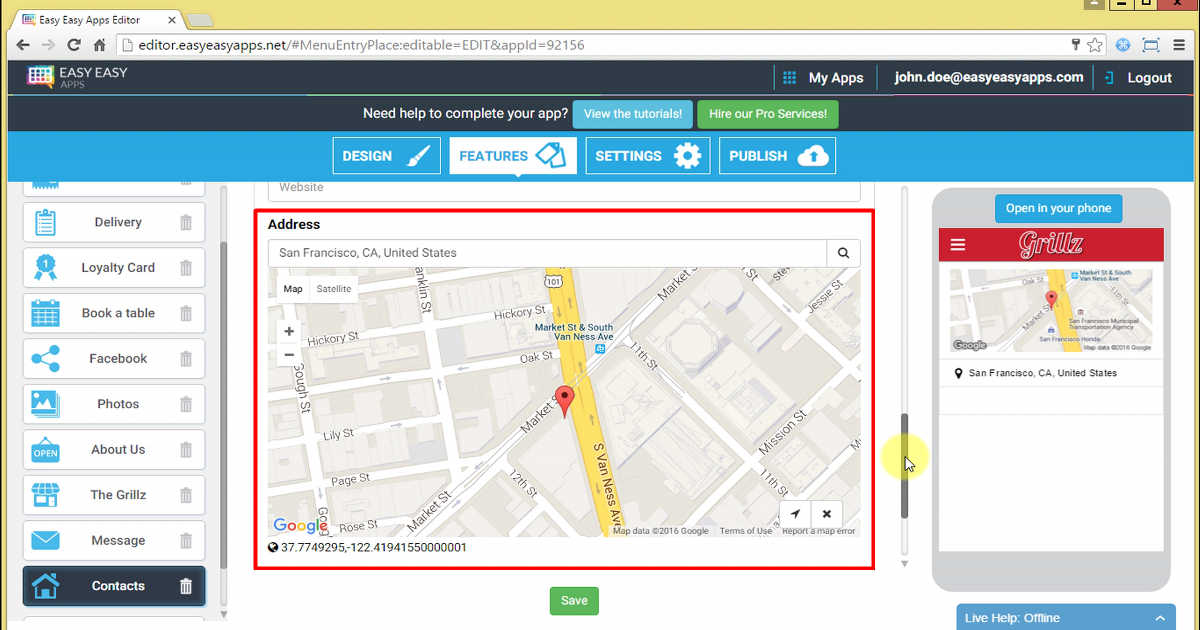
When the user presses on the map image, or address, he will be able to go straight to the maps app, that’s installed on his Smartphone, and get directions to your establishment.
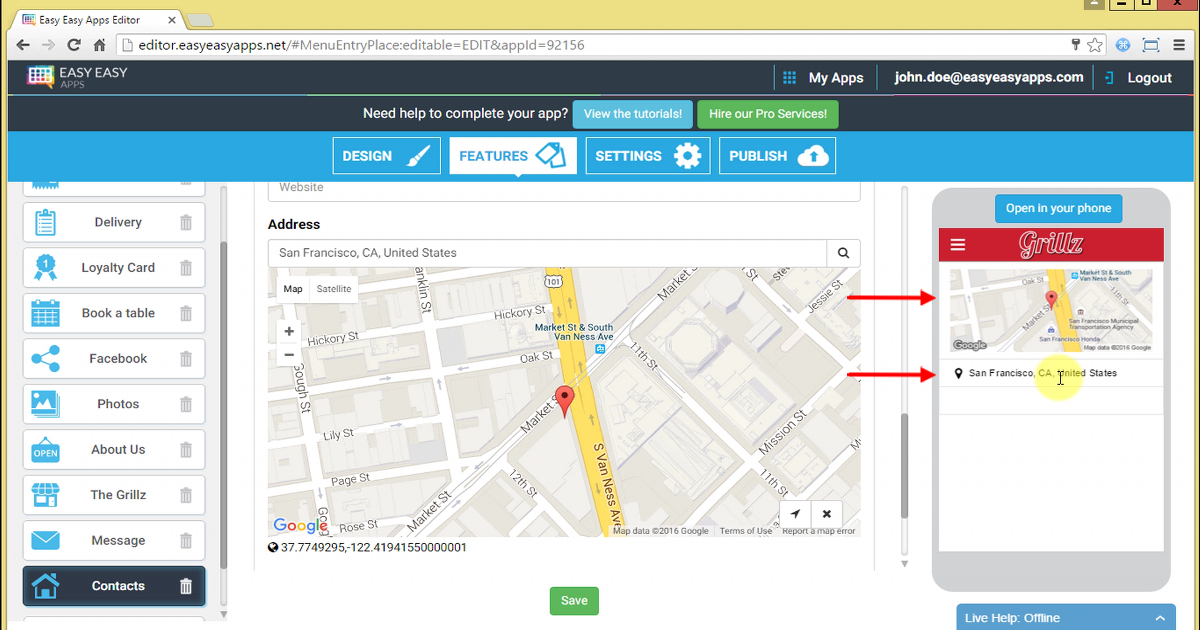
To configure the address, you can enter the full address in the designated field as if you were entering it in Google Maps.
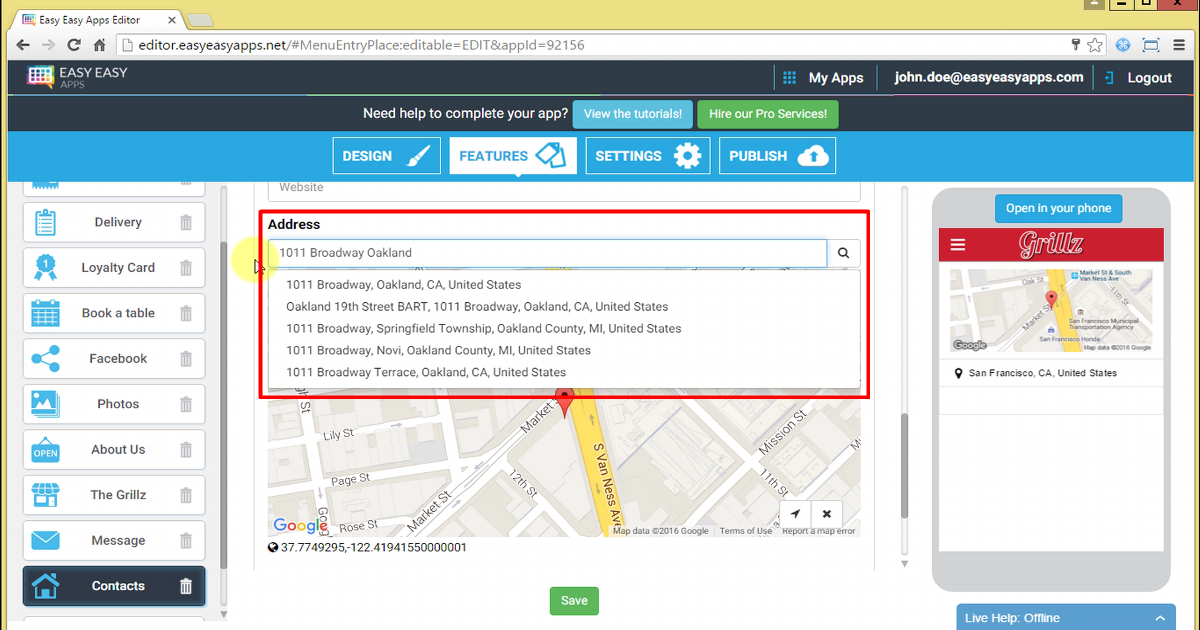
Automatically, the app maker will try to complete your address giving you the best suggestions based on Google maps information. After you enter your complete address, press the enter key or on the magnifying glass icon.
The calculation of your position on the map is done automatically depending on the address you entered.
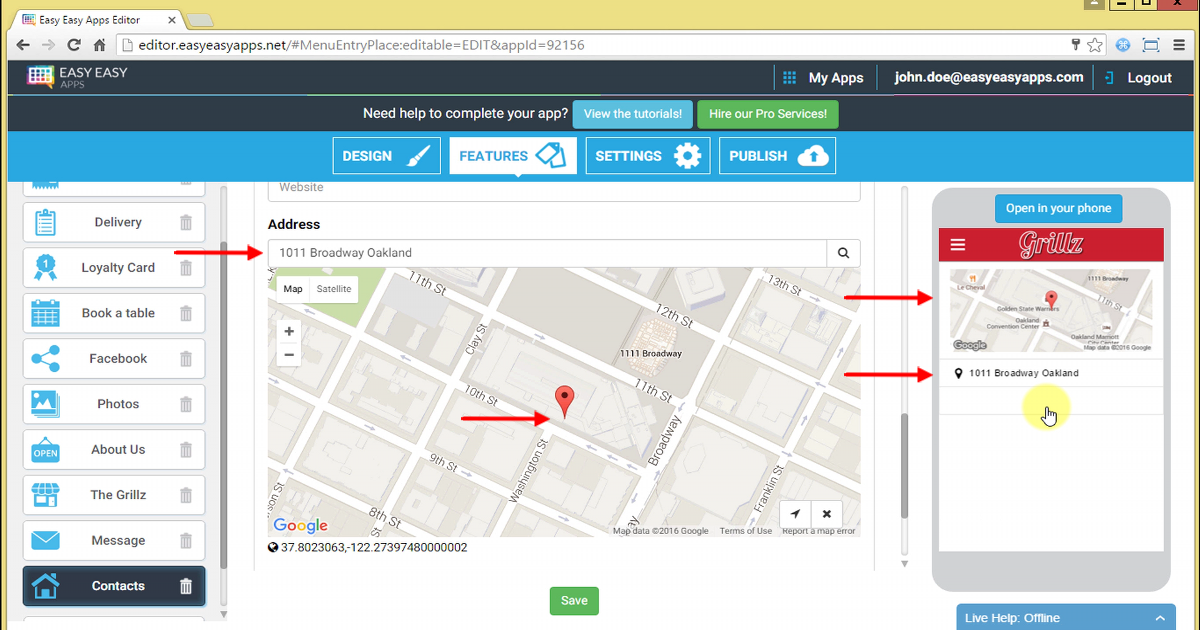
You can also drag the map and put the pin in the right location. Then an update symbol will appear in the address box.
Pressing the update symbol in the address box, the app maker will automatically calculate the address of the location where the pin is.
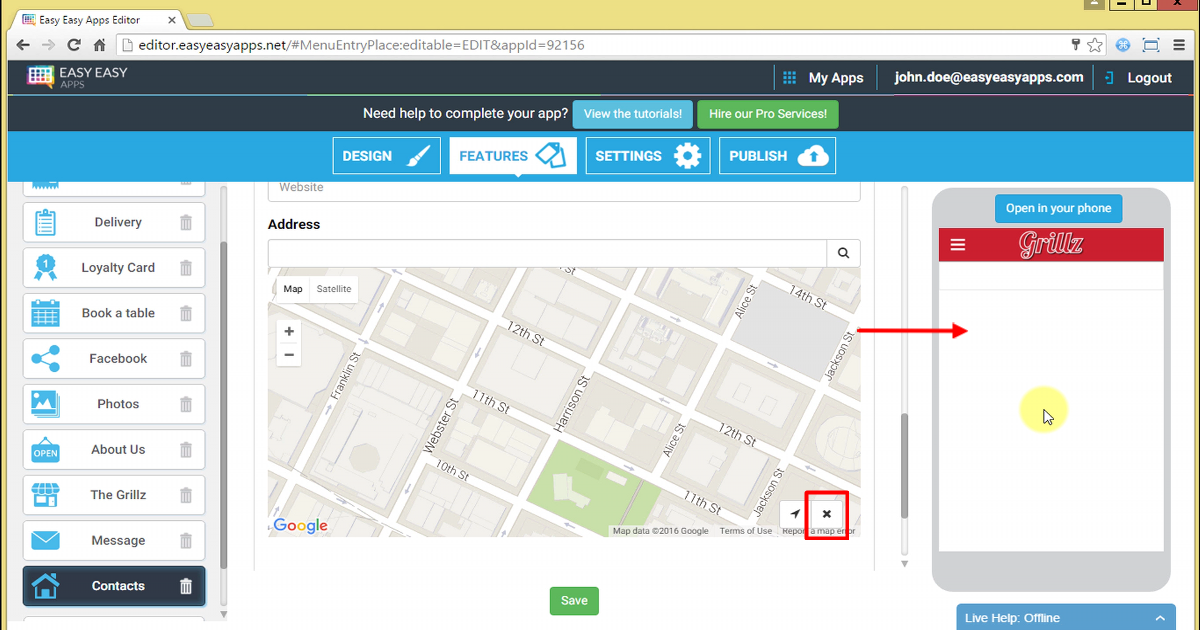
If you don’t want to display the map and the address in the Smartphone, press the “X” button and the data will be erased.
Thank you for watching this tutorial, leave your comments and we will contact you.