How to configure push notifications for Android
Configure push notifications for your Android app on Google Cloud
In this tutorial we will teach you how to configure the push notifications for you Android application on Google Cloud.
Let's start:
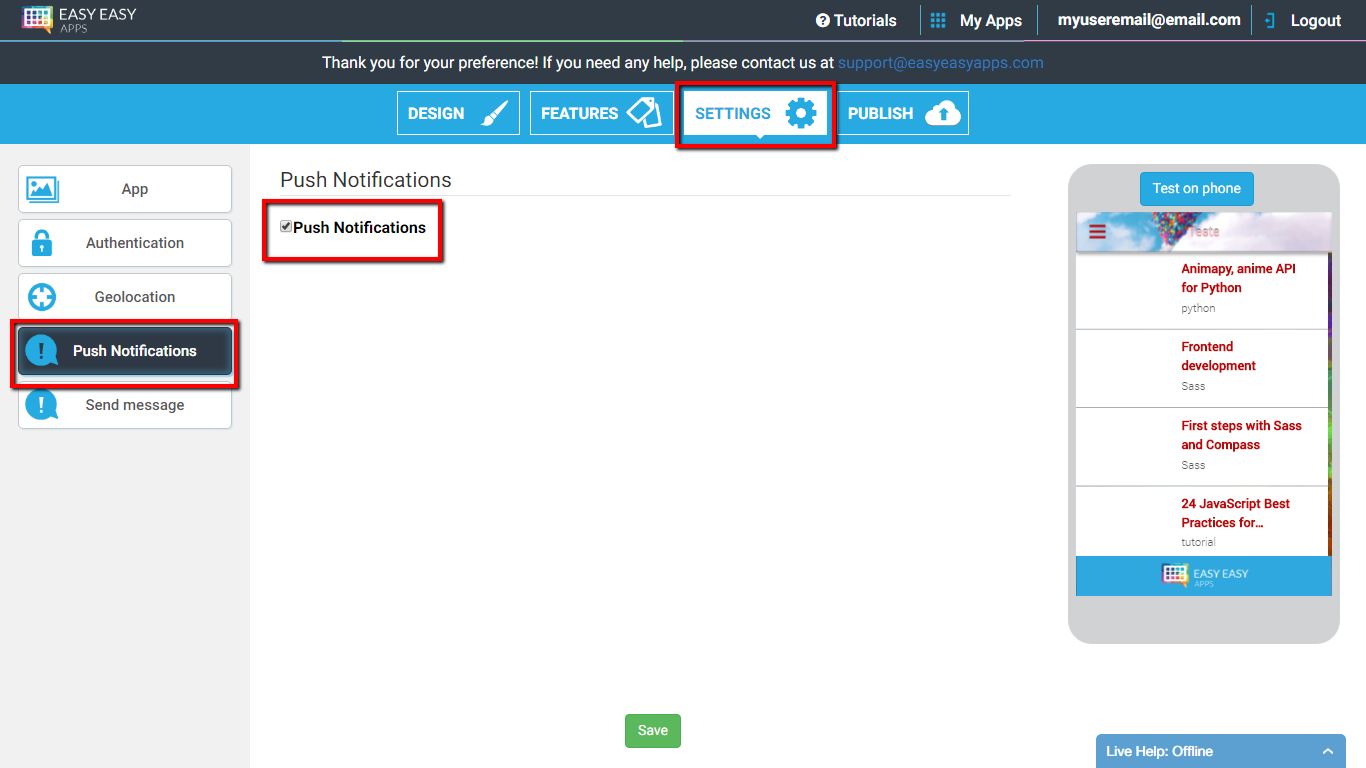
- First of all we need to activate the push notifications on the Easy Easy Apps editor by going to the Settings > Push Notifications and ticking the Push Notifications checkbox. This will activate the push notifications for your application.
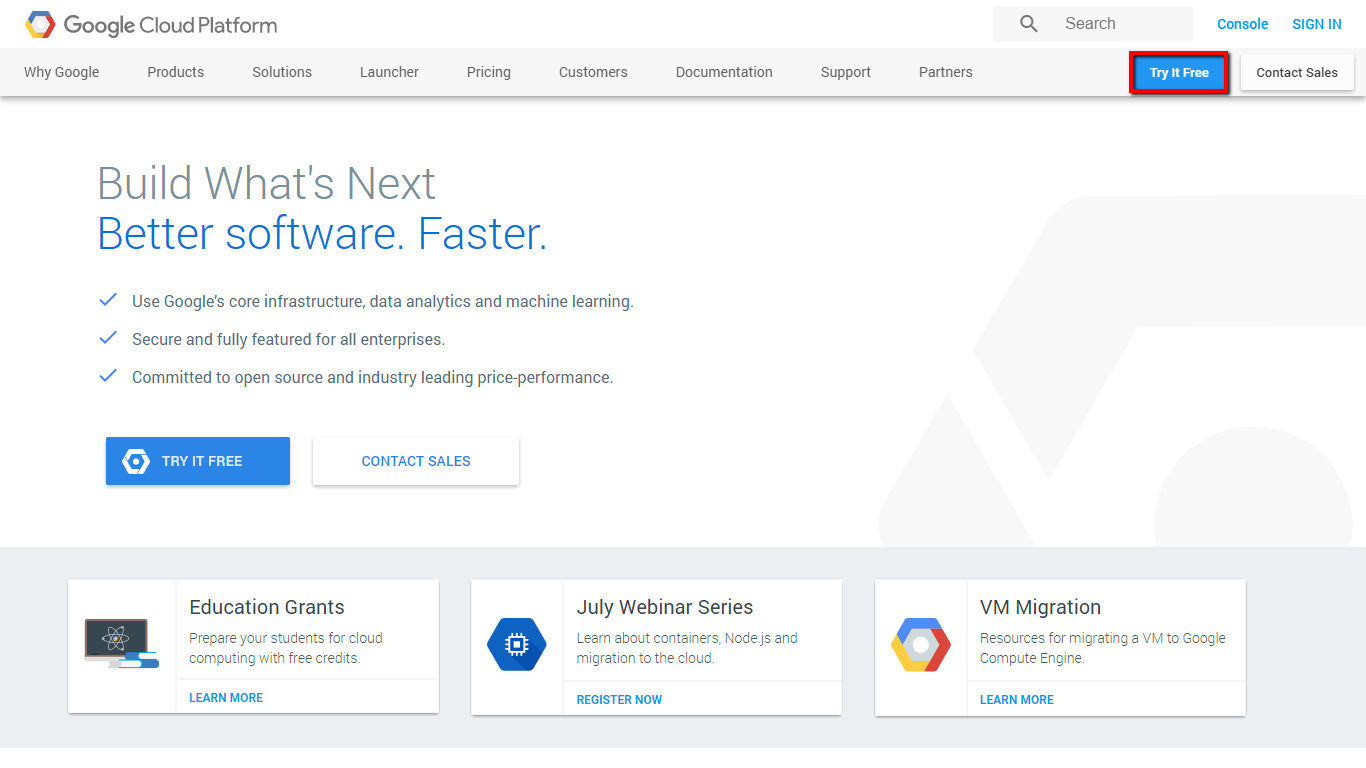
- Create a free account on Google Cloud by clicking the Try it Free button.
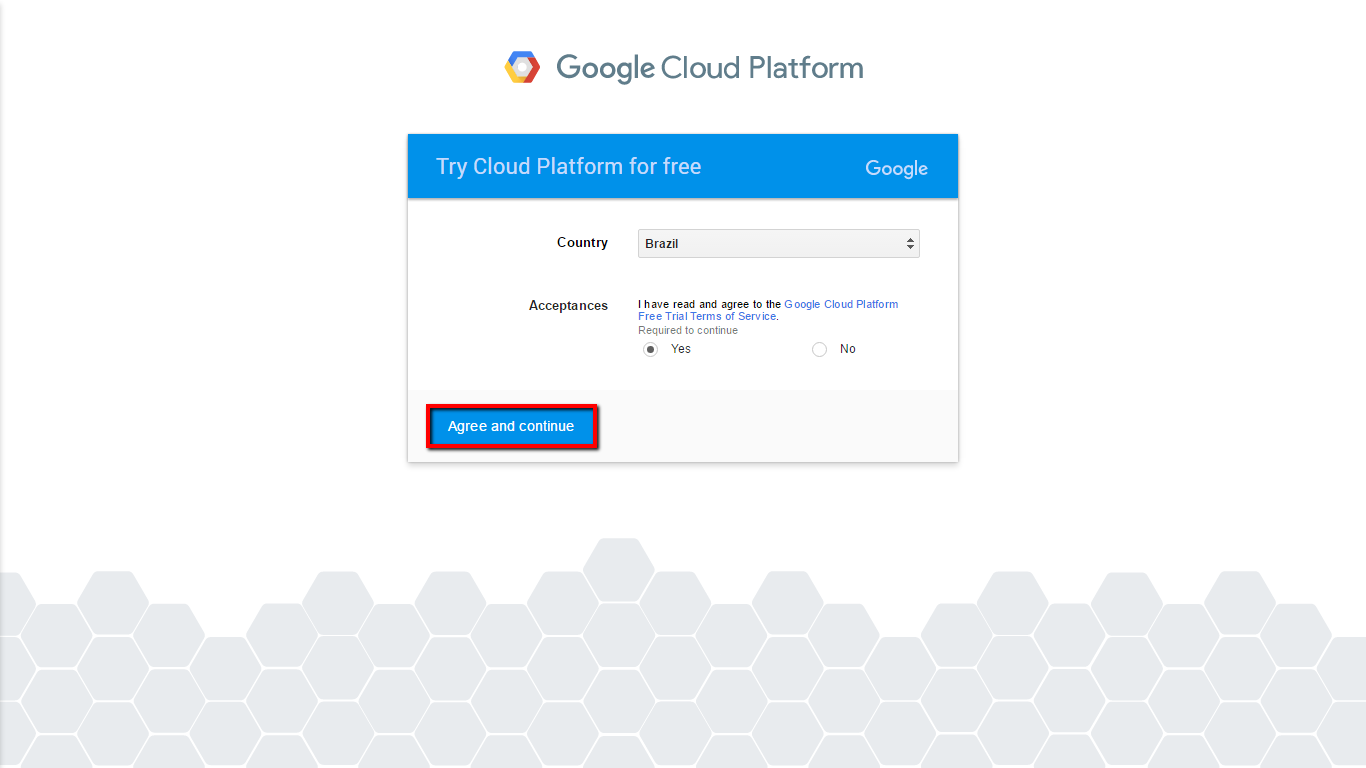
- Pick your country, accept the terms and conditions and push Agree and continue.
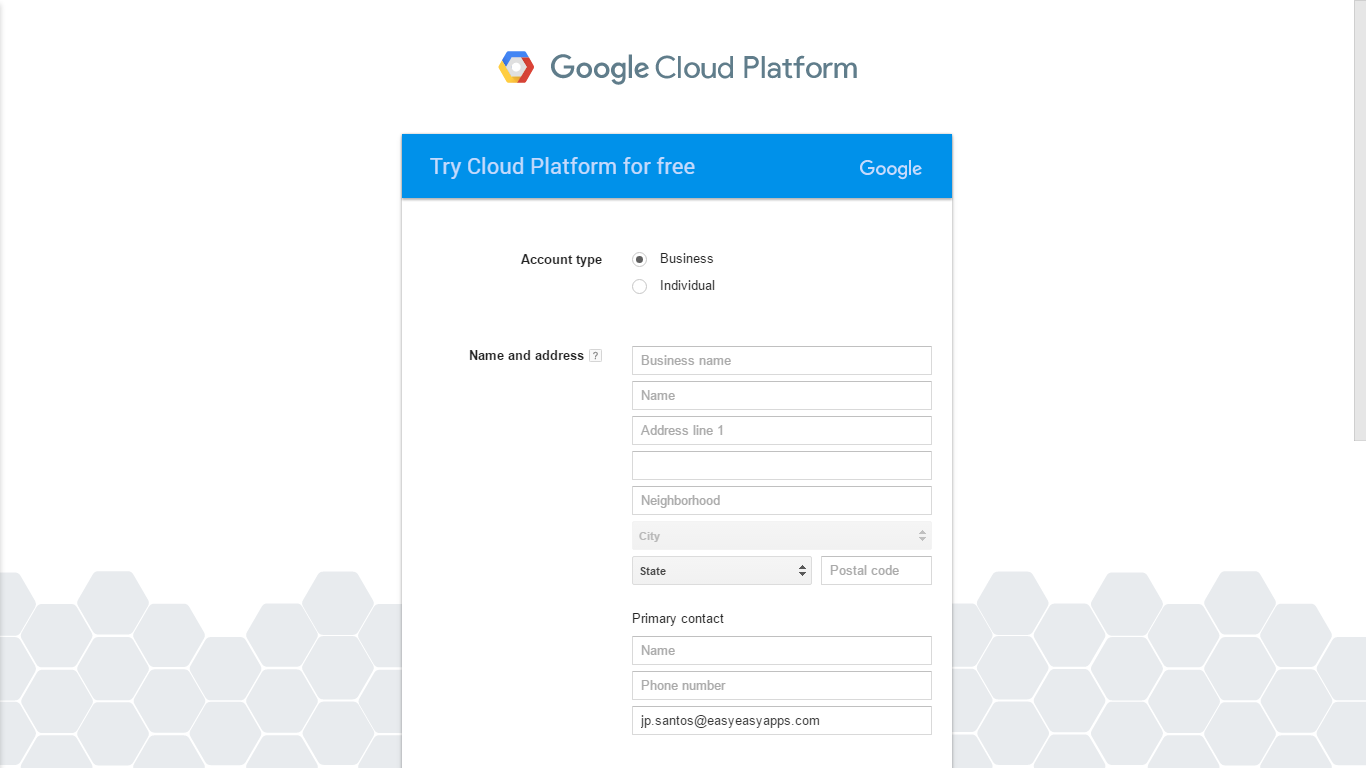
- Insert your personal info.
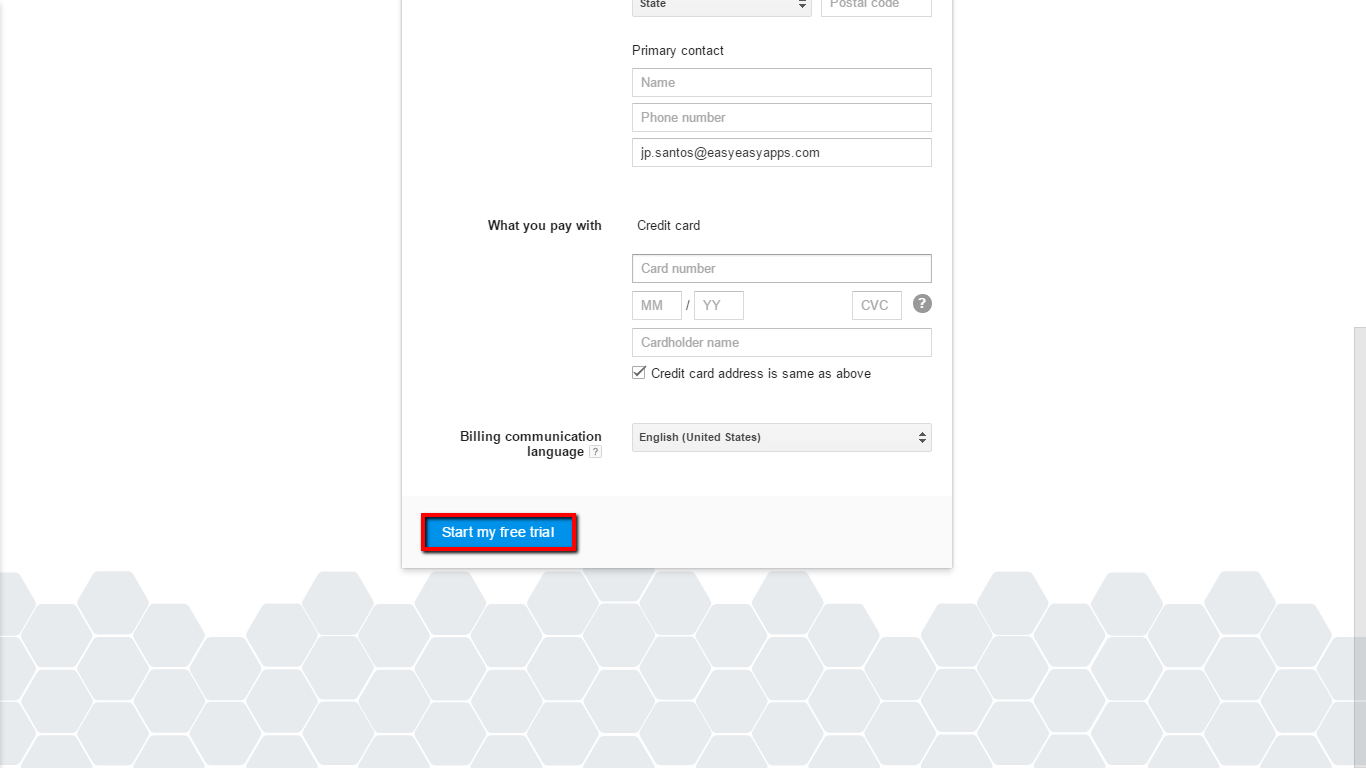
- Insert the billing info and push Start my free trial.
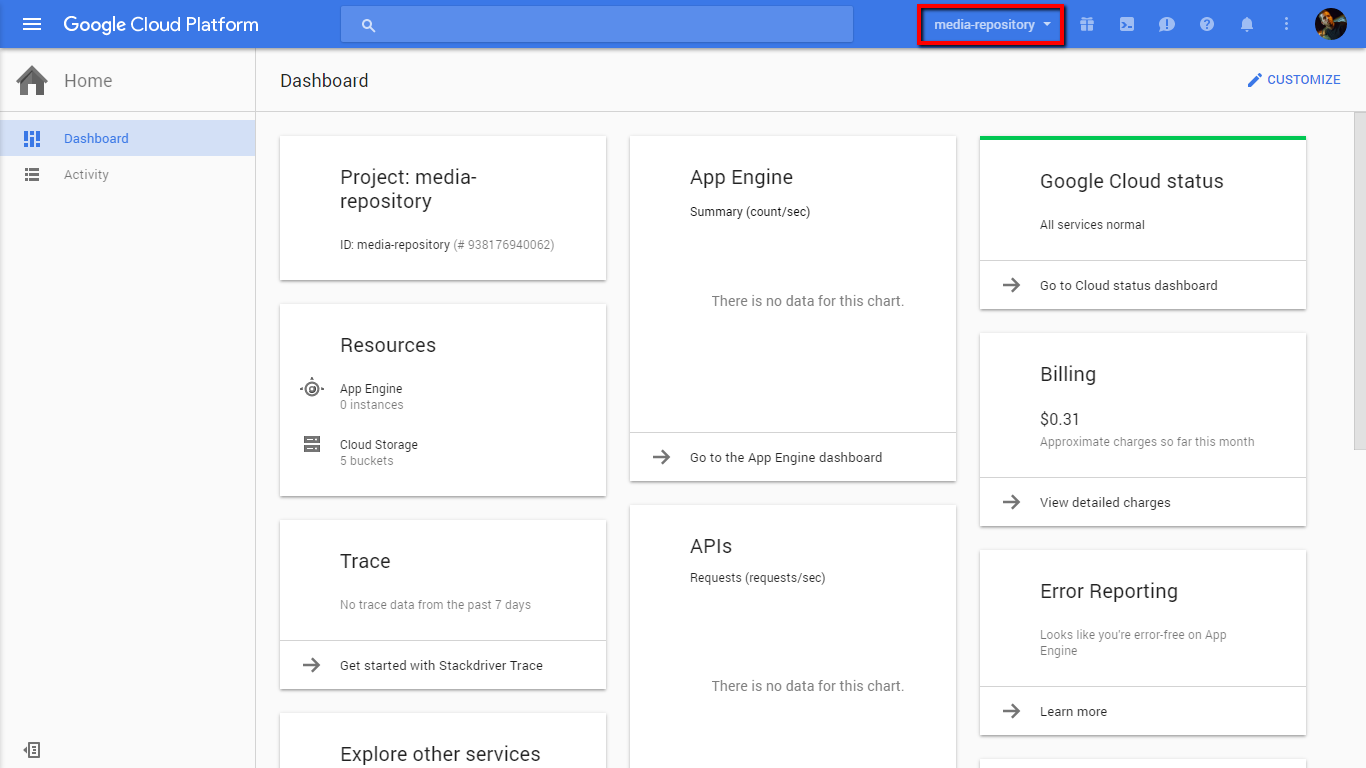
- On https://console.cloud.google.com/home/dashboard push the arrow upper right corner as it's shown in the image.
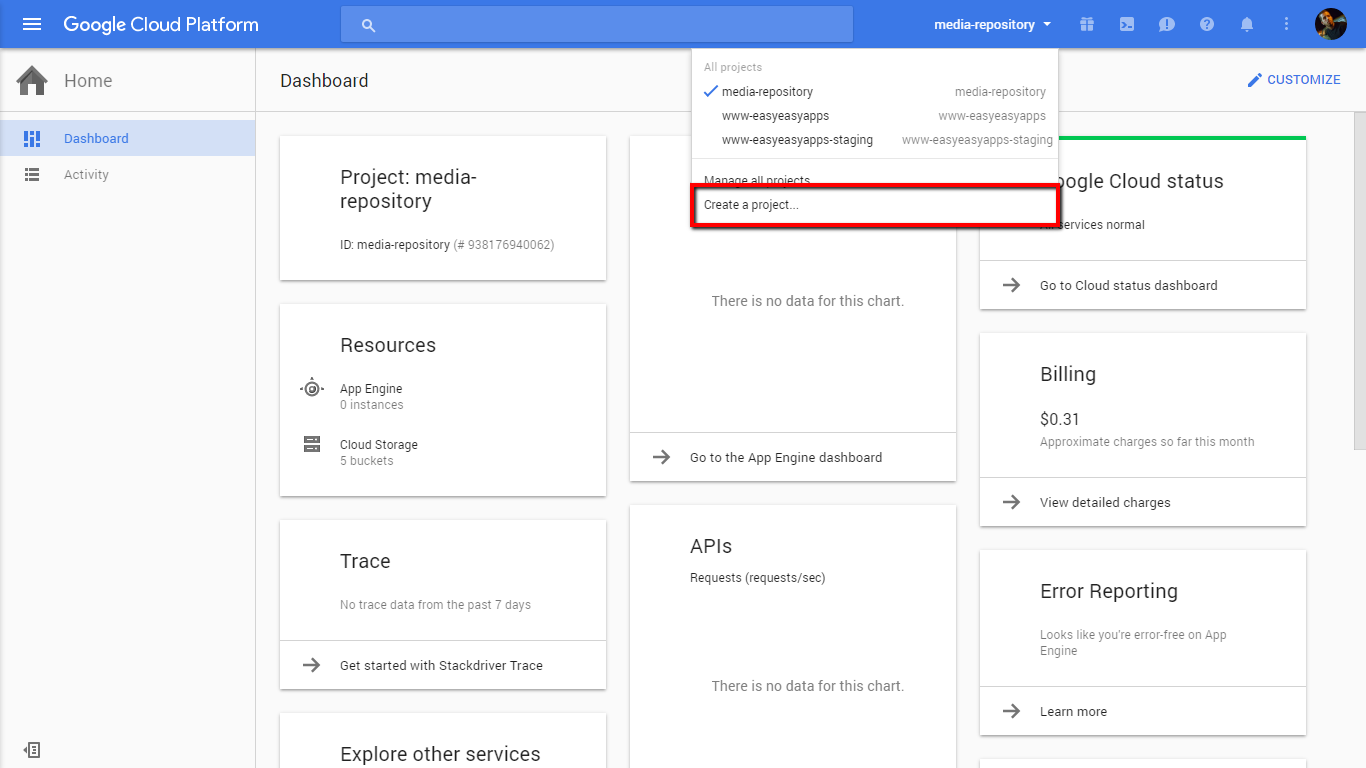
- Select Create a project.
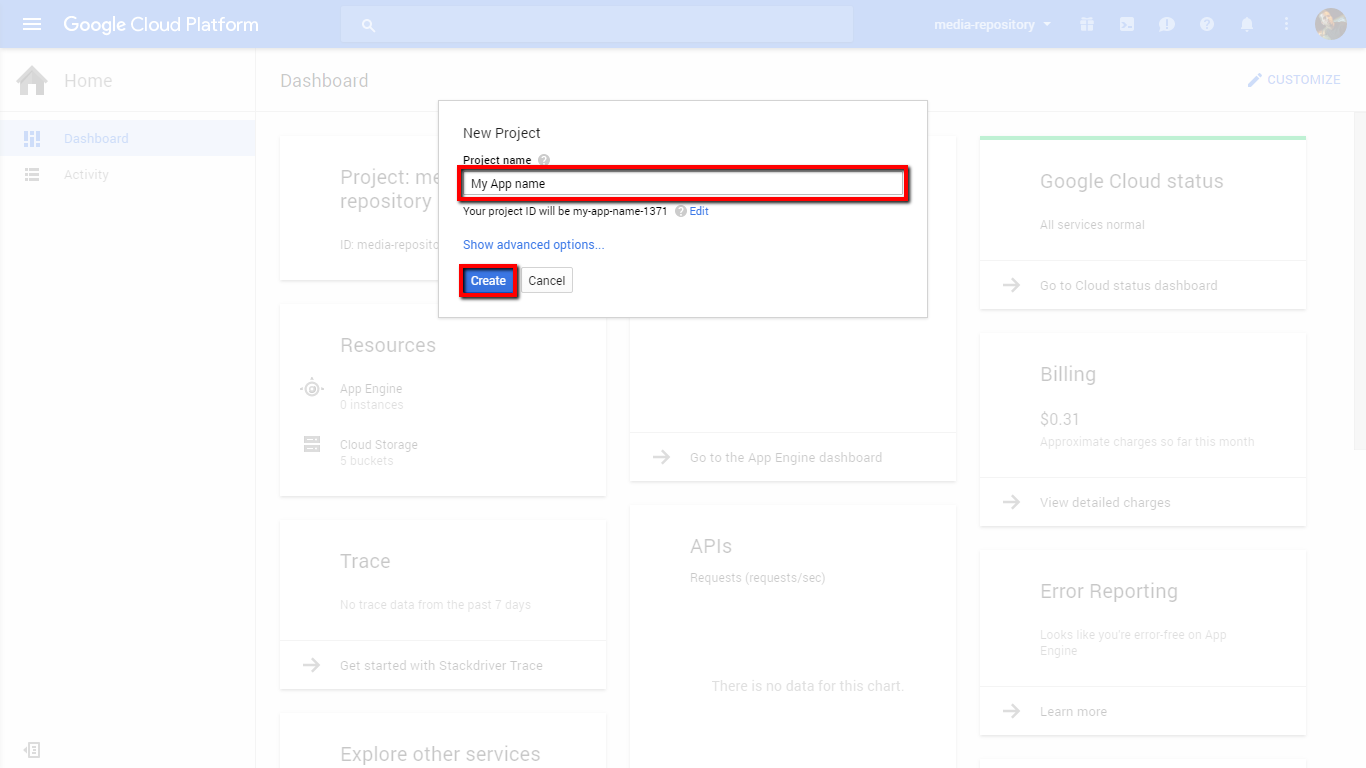
- Insert the name of your application and push Create.
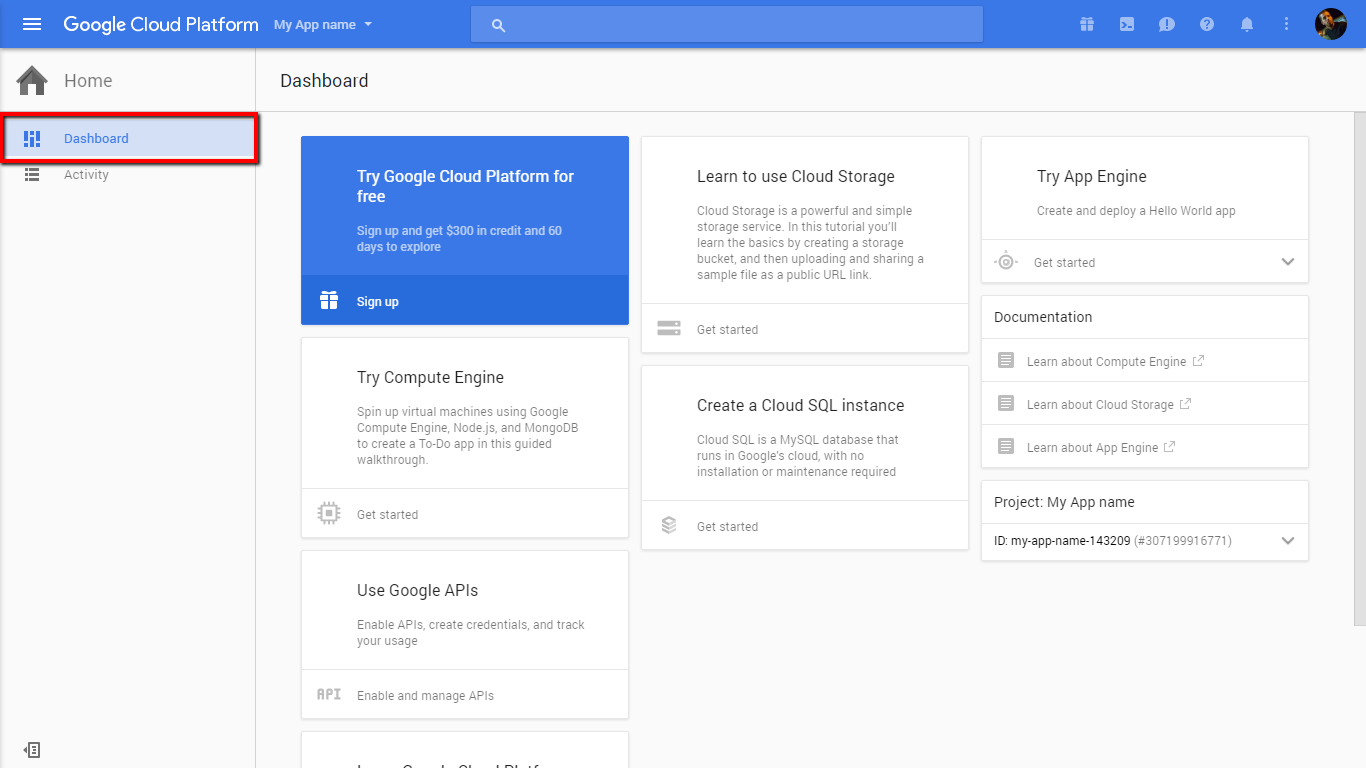
- As soon as the process is complete you should see the Dashboard.
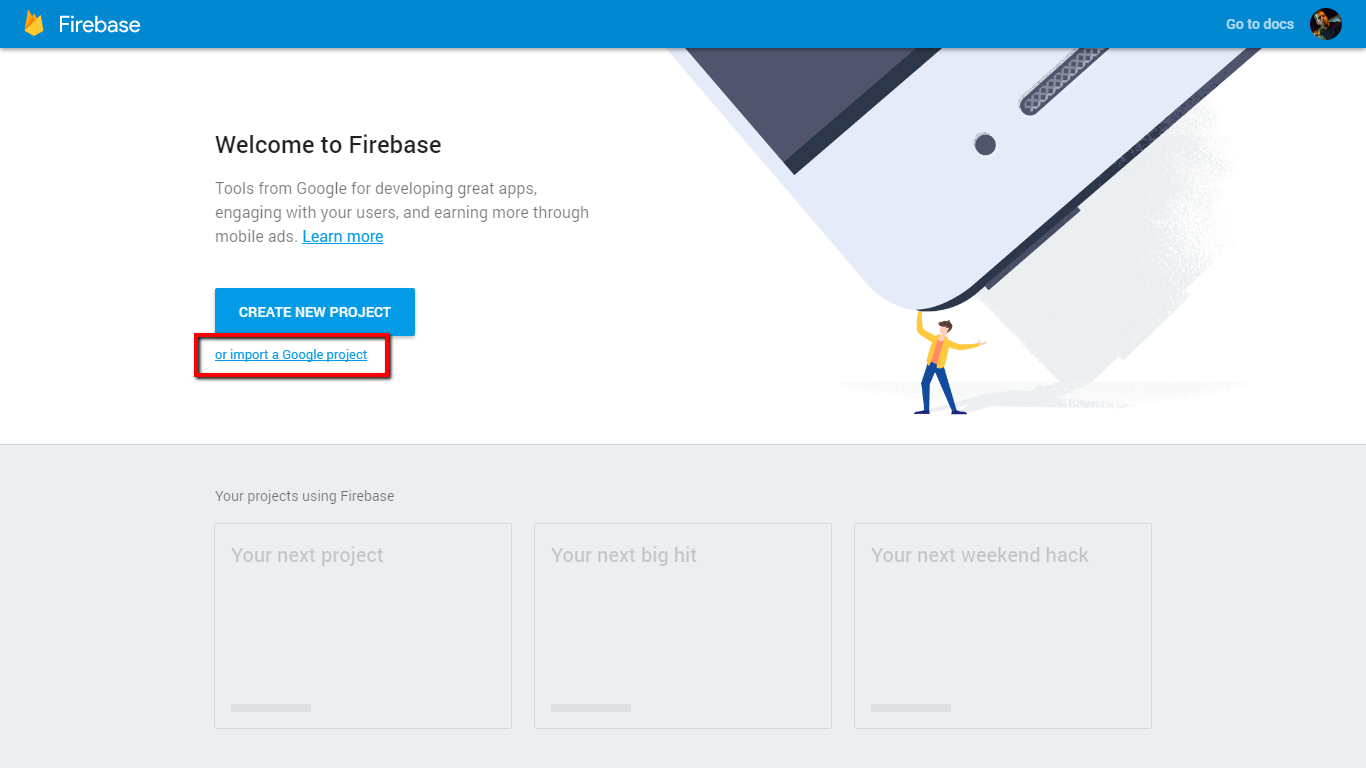
- You should now access the Firebase console on https://console.firebase.google.com/ and push the "or import a Google project" link.
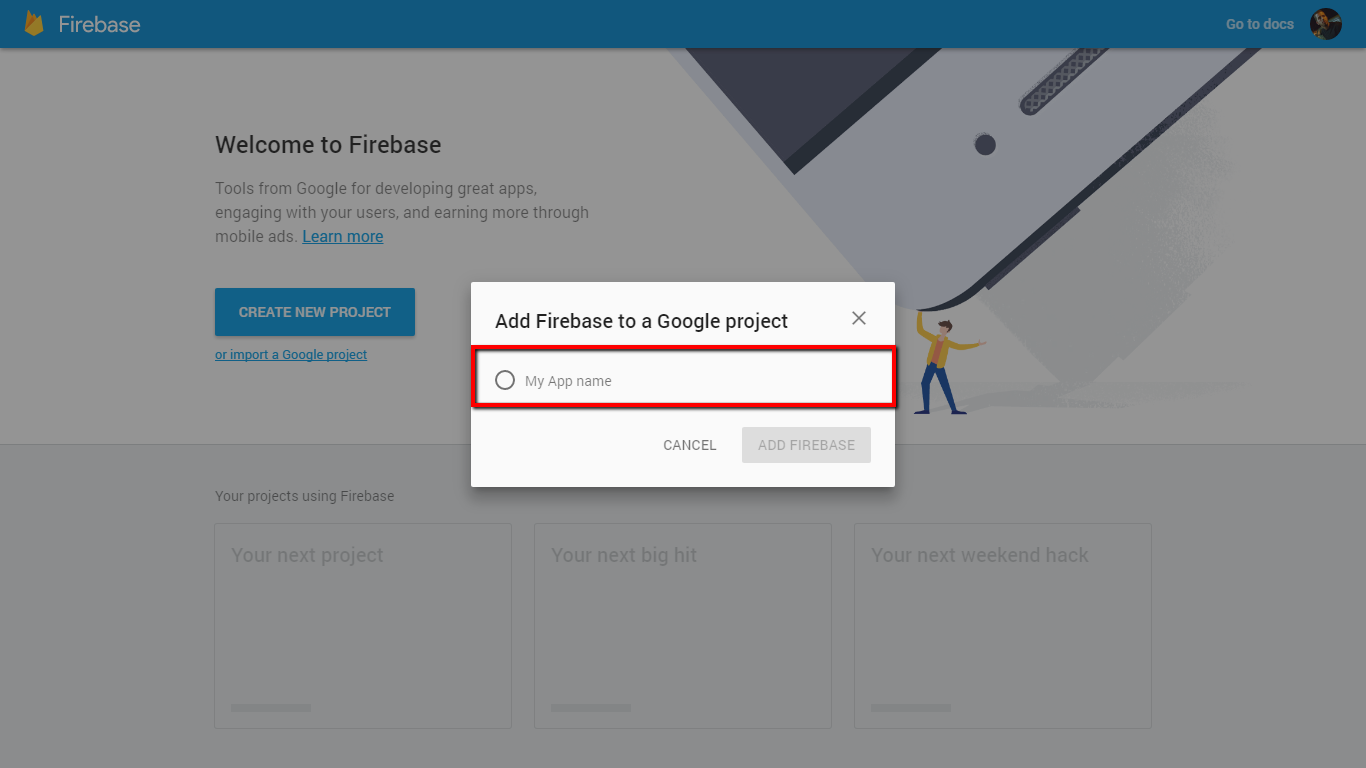
- Now you should select the name of the project you created previously (eg. My App name).
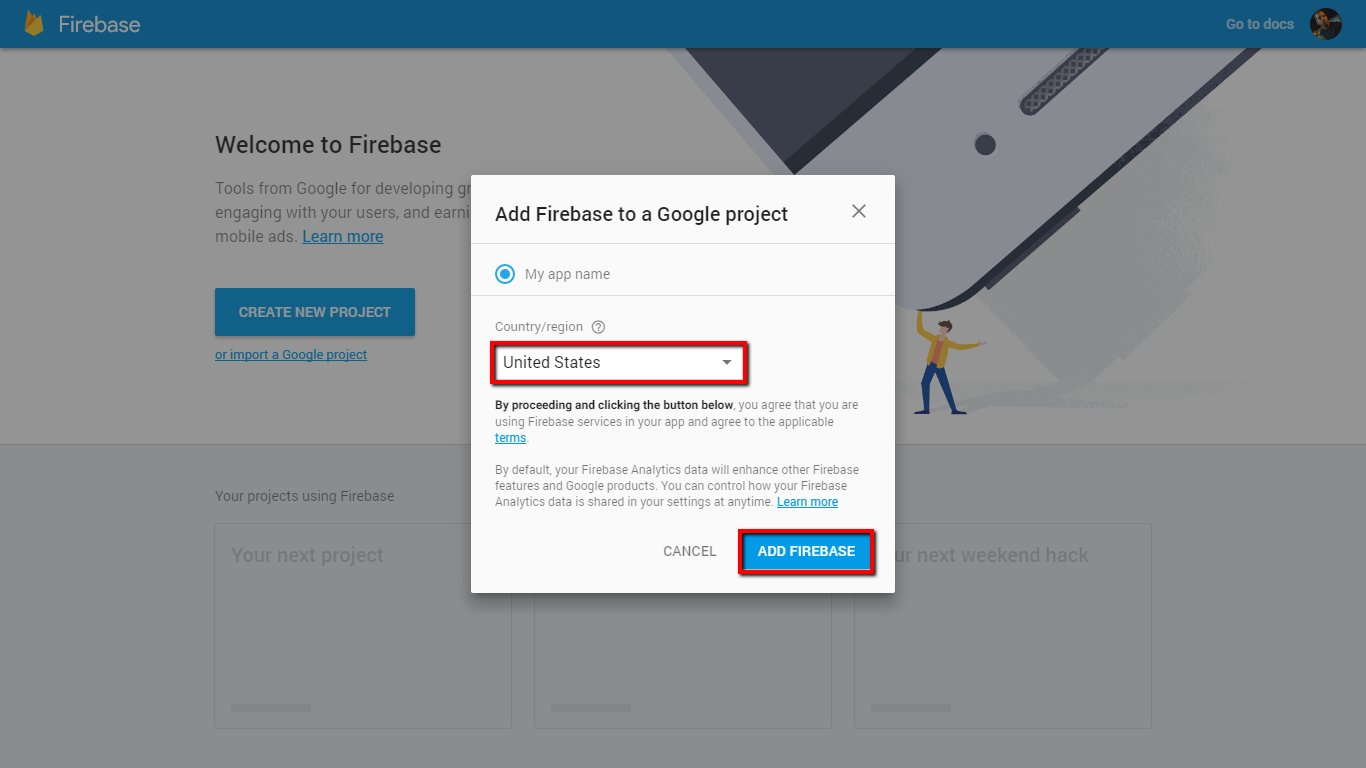
- Select the country and push the Add Firebase button.
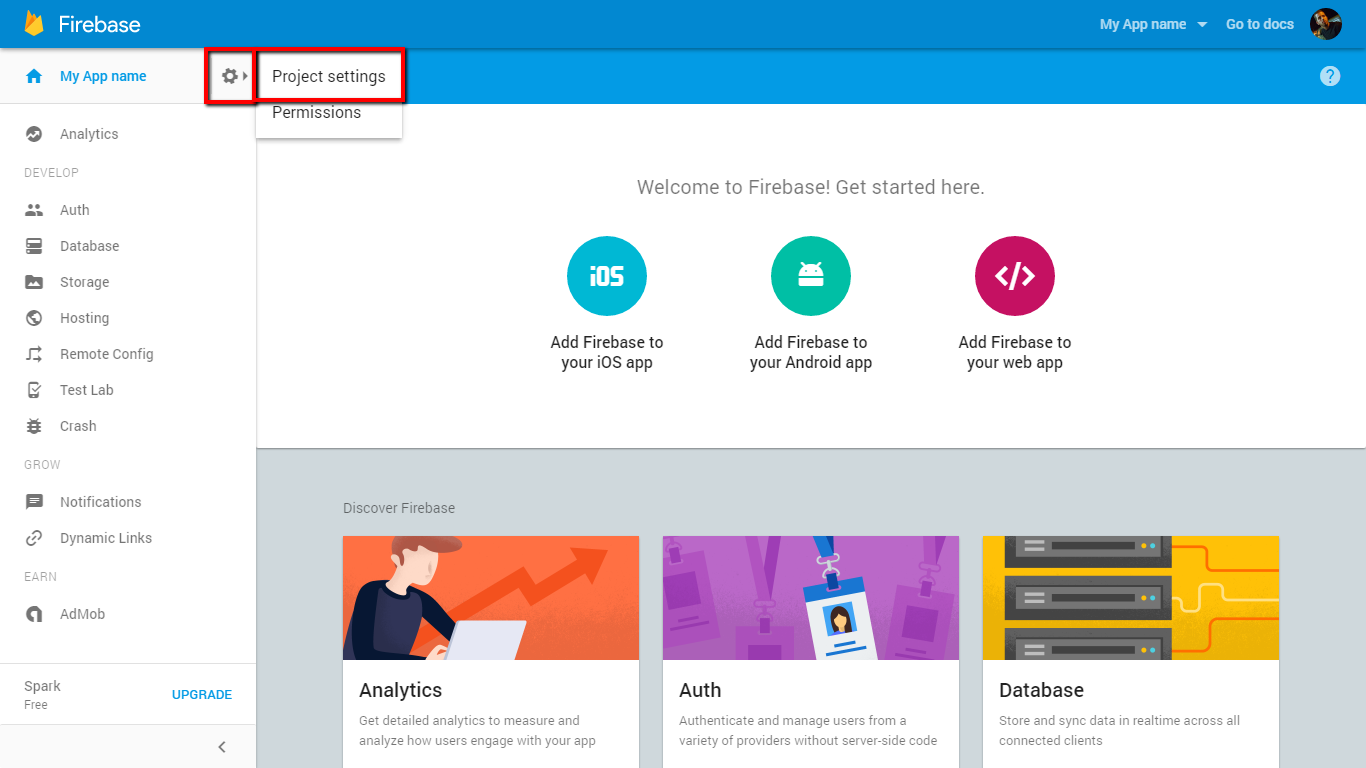
- On this screen you should push the cog icon and select the Project settings option.
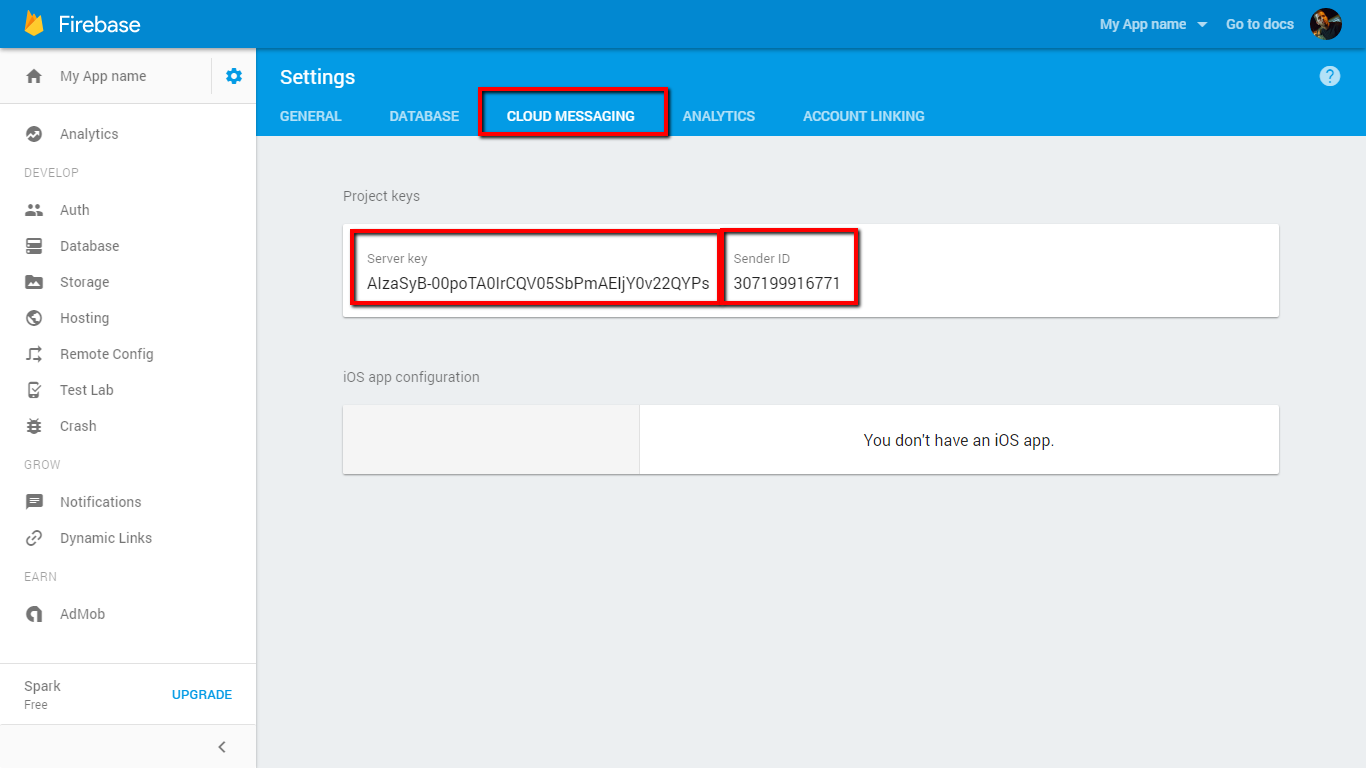
- Now you should select the Cloud Messaging tab and there you are now able to see the necessary credentials for the Easy Easy Apps Editor - Server Key and Sender ID.
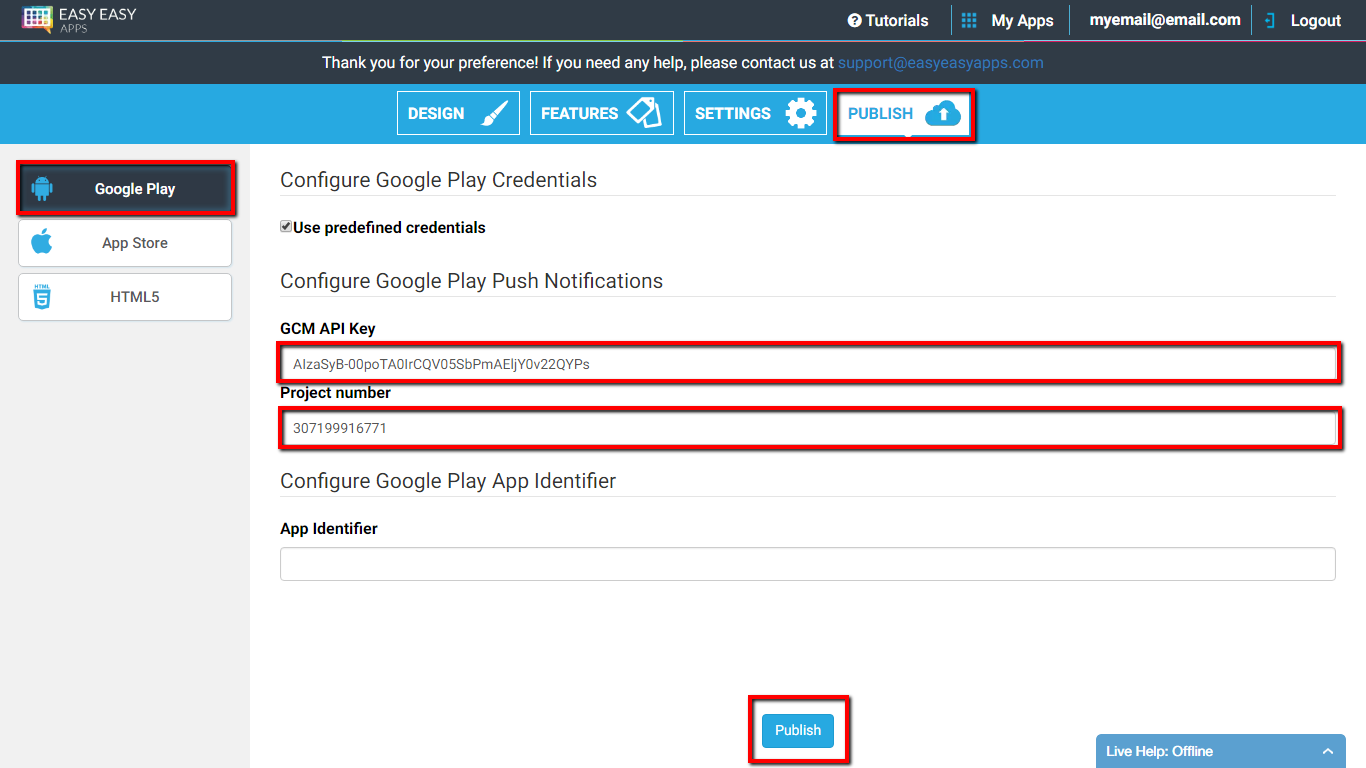
- You should now access the Easy Easy Apps Editor on the Publish tab. Click on Google Play and copy the Server key from Firebase to the GCM API Key input field. Copy the Server ID to the Project number input field and push the Publish button.
Congratulations! You finished configuring the push notifications.
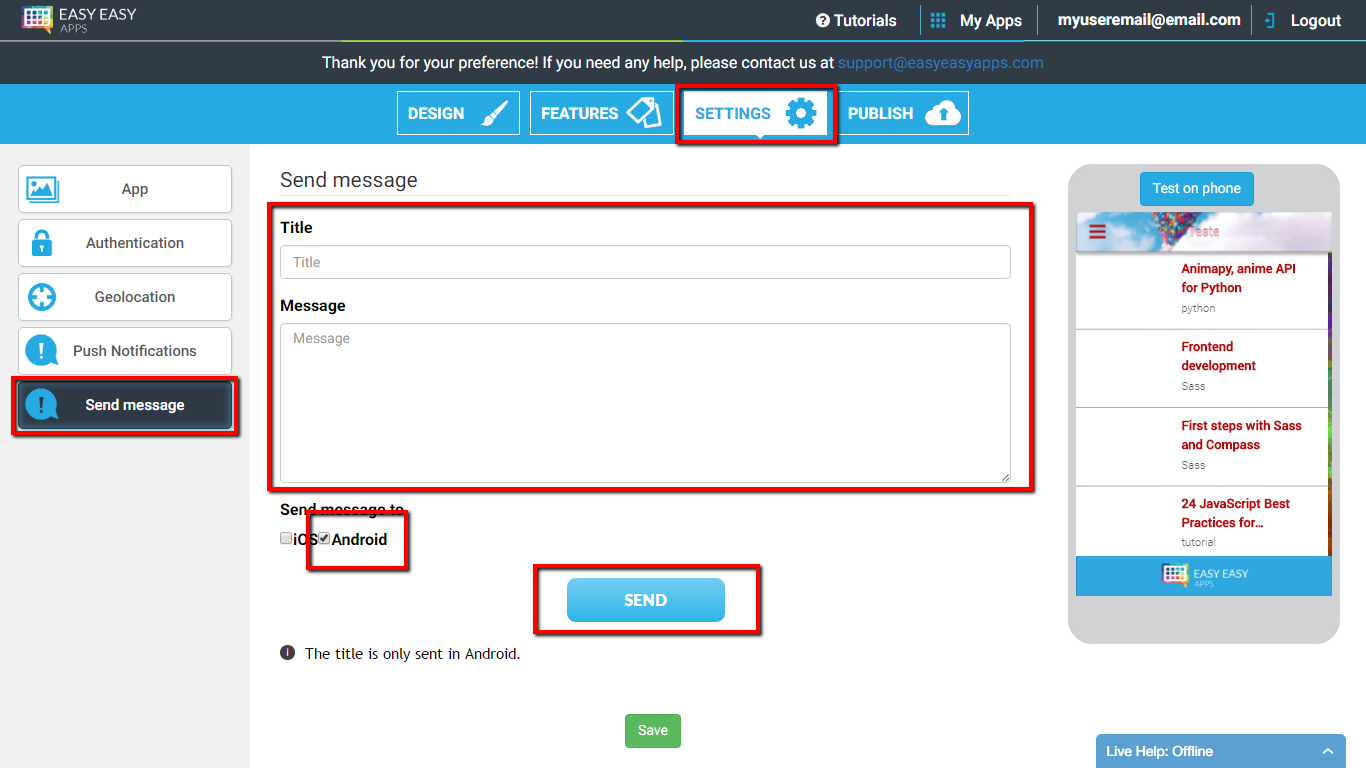
From now on, once you publish your app you can go to Settings > Send message and write a message with Title and Message.
You should pick the Android checkbox in order to send the message to the Android devices and then push the Send button.
This way all your messages will reach all your app's users instantly!
Thank you for following this tutorial.
Leave your comments and we will contact you and if you liked it don't forget to share.